It’s that time of the year again – Skylum and ON1 are spinning up their marketing machines to convince you that this year, really, their software is going to take things to the next level. Seriously. Trust us. A revolution is on the way. Again.
I’ve been pretty critical of Skylum and ON1 in the past for their business model, failure to get promised features into their software, their tendency to miss release dates, and their focus on gimmicks over core functionality. A lot of that could be forgiven, of course, if the result coming out of the product was superior to the alternatives. Unfortunately, in my experience, I haven’t found that to be the case.
Over the coming weeks, I want to put a bit more flesh on that argument by looking at a variety of images I’ve shot in each of the three packages. I need to issue my standard caveats here: 1) I’m a lot more familiar with Lightroom than I am with either Luminar or Photo RAW, so on some level I should get better results with Lightroom. 2) I’m not a paid spokesman for any of these companies. I bought my own copies of this software, just like any member of the public, and 3) your results might be different than mine. I’m not suggesting that any of these programs is incapable of producing decent images, but it may highlight some areas where each raw engine is likely to fail.
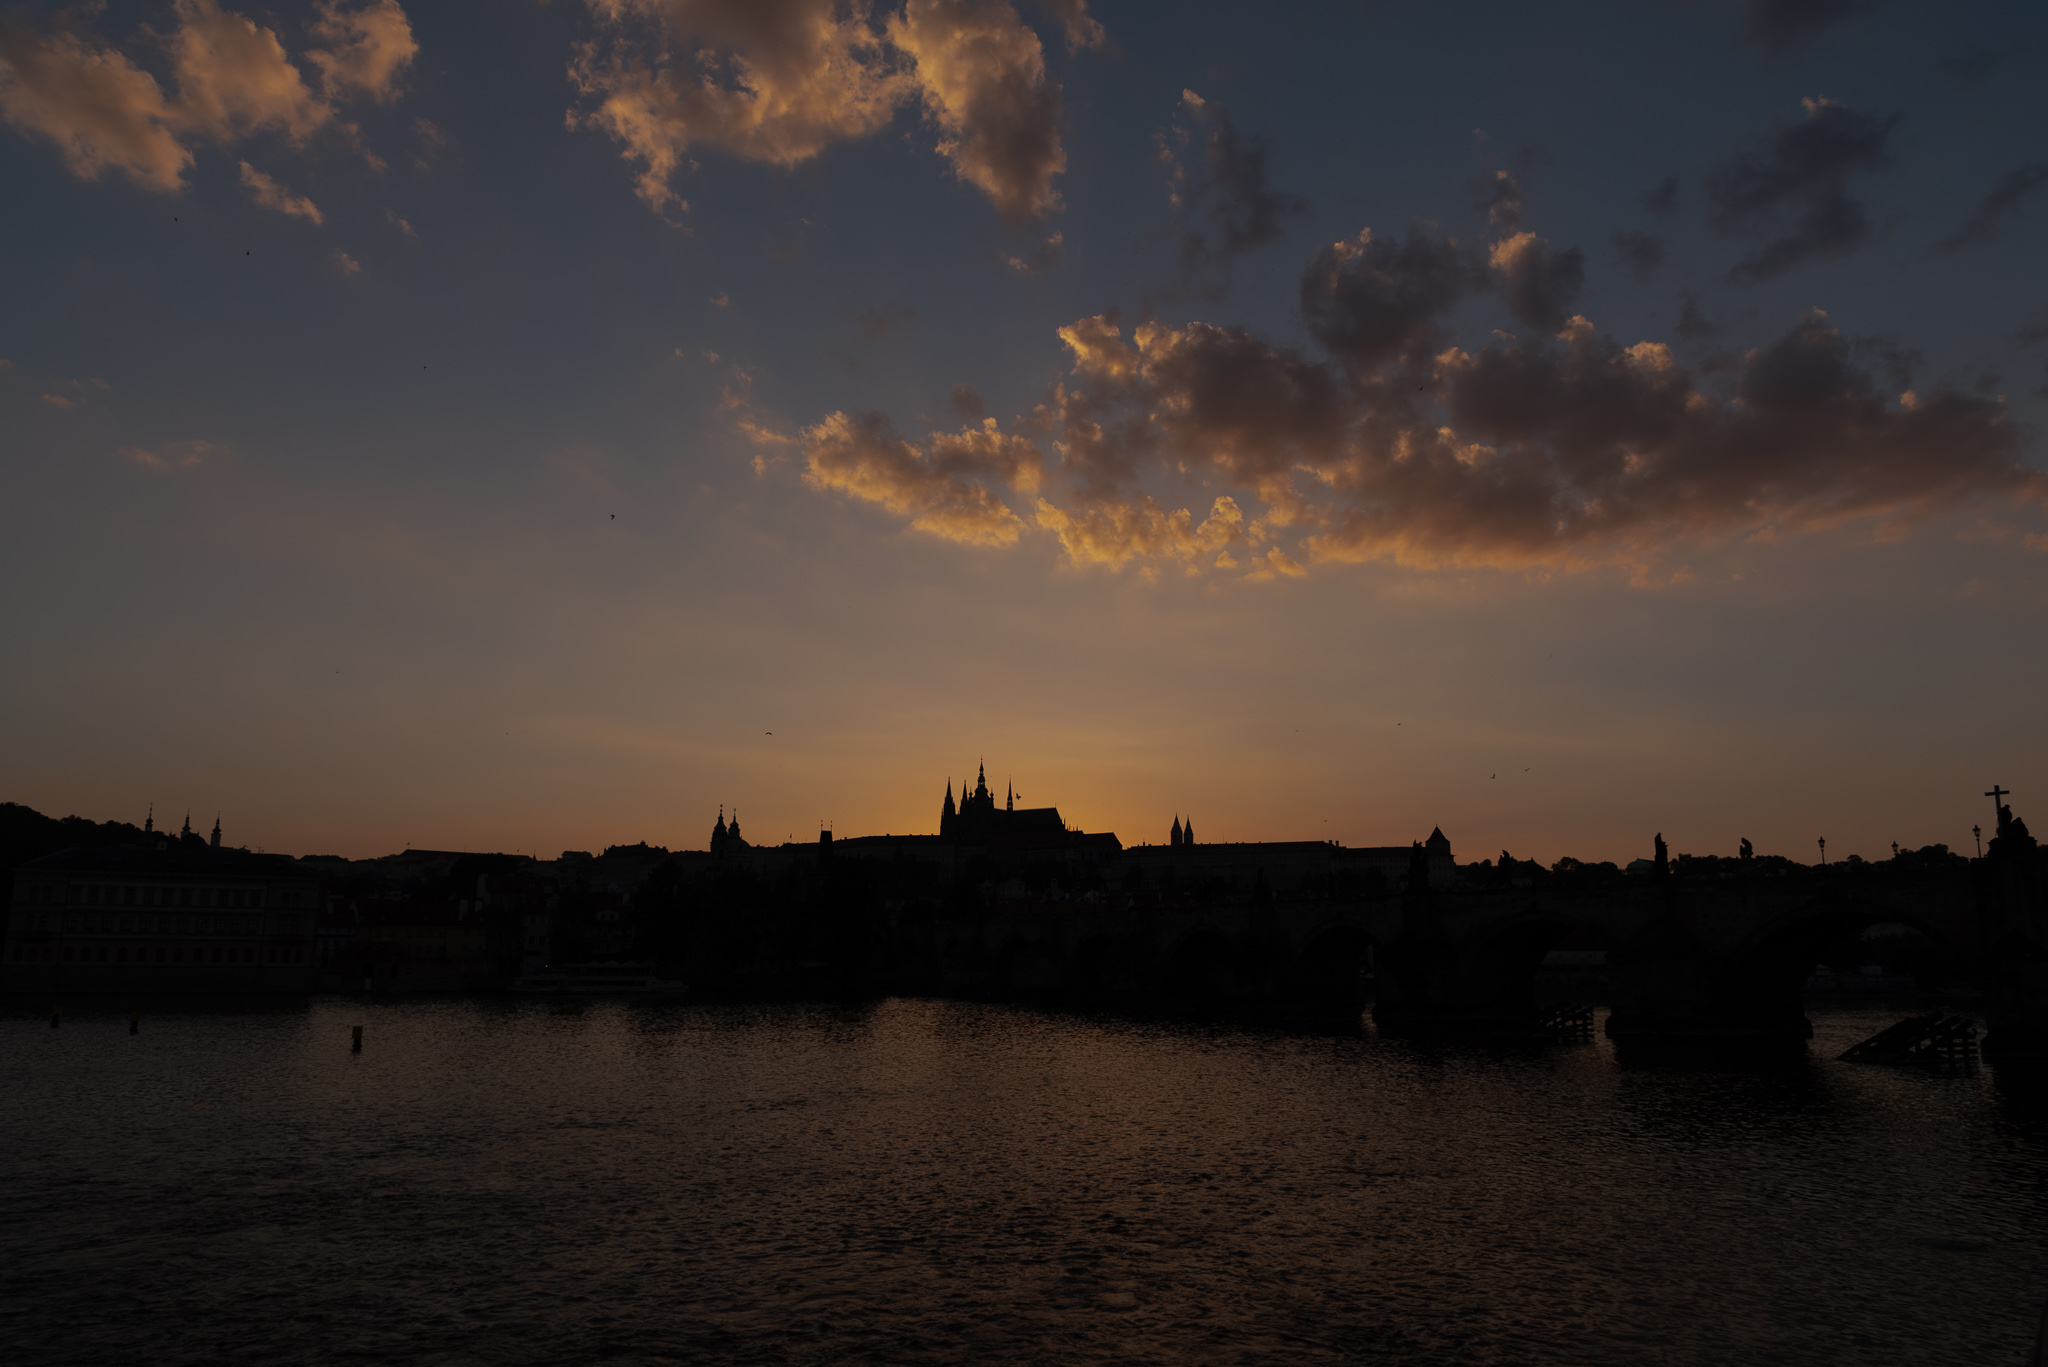
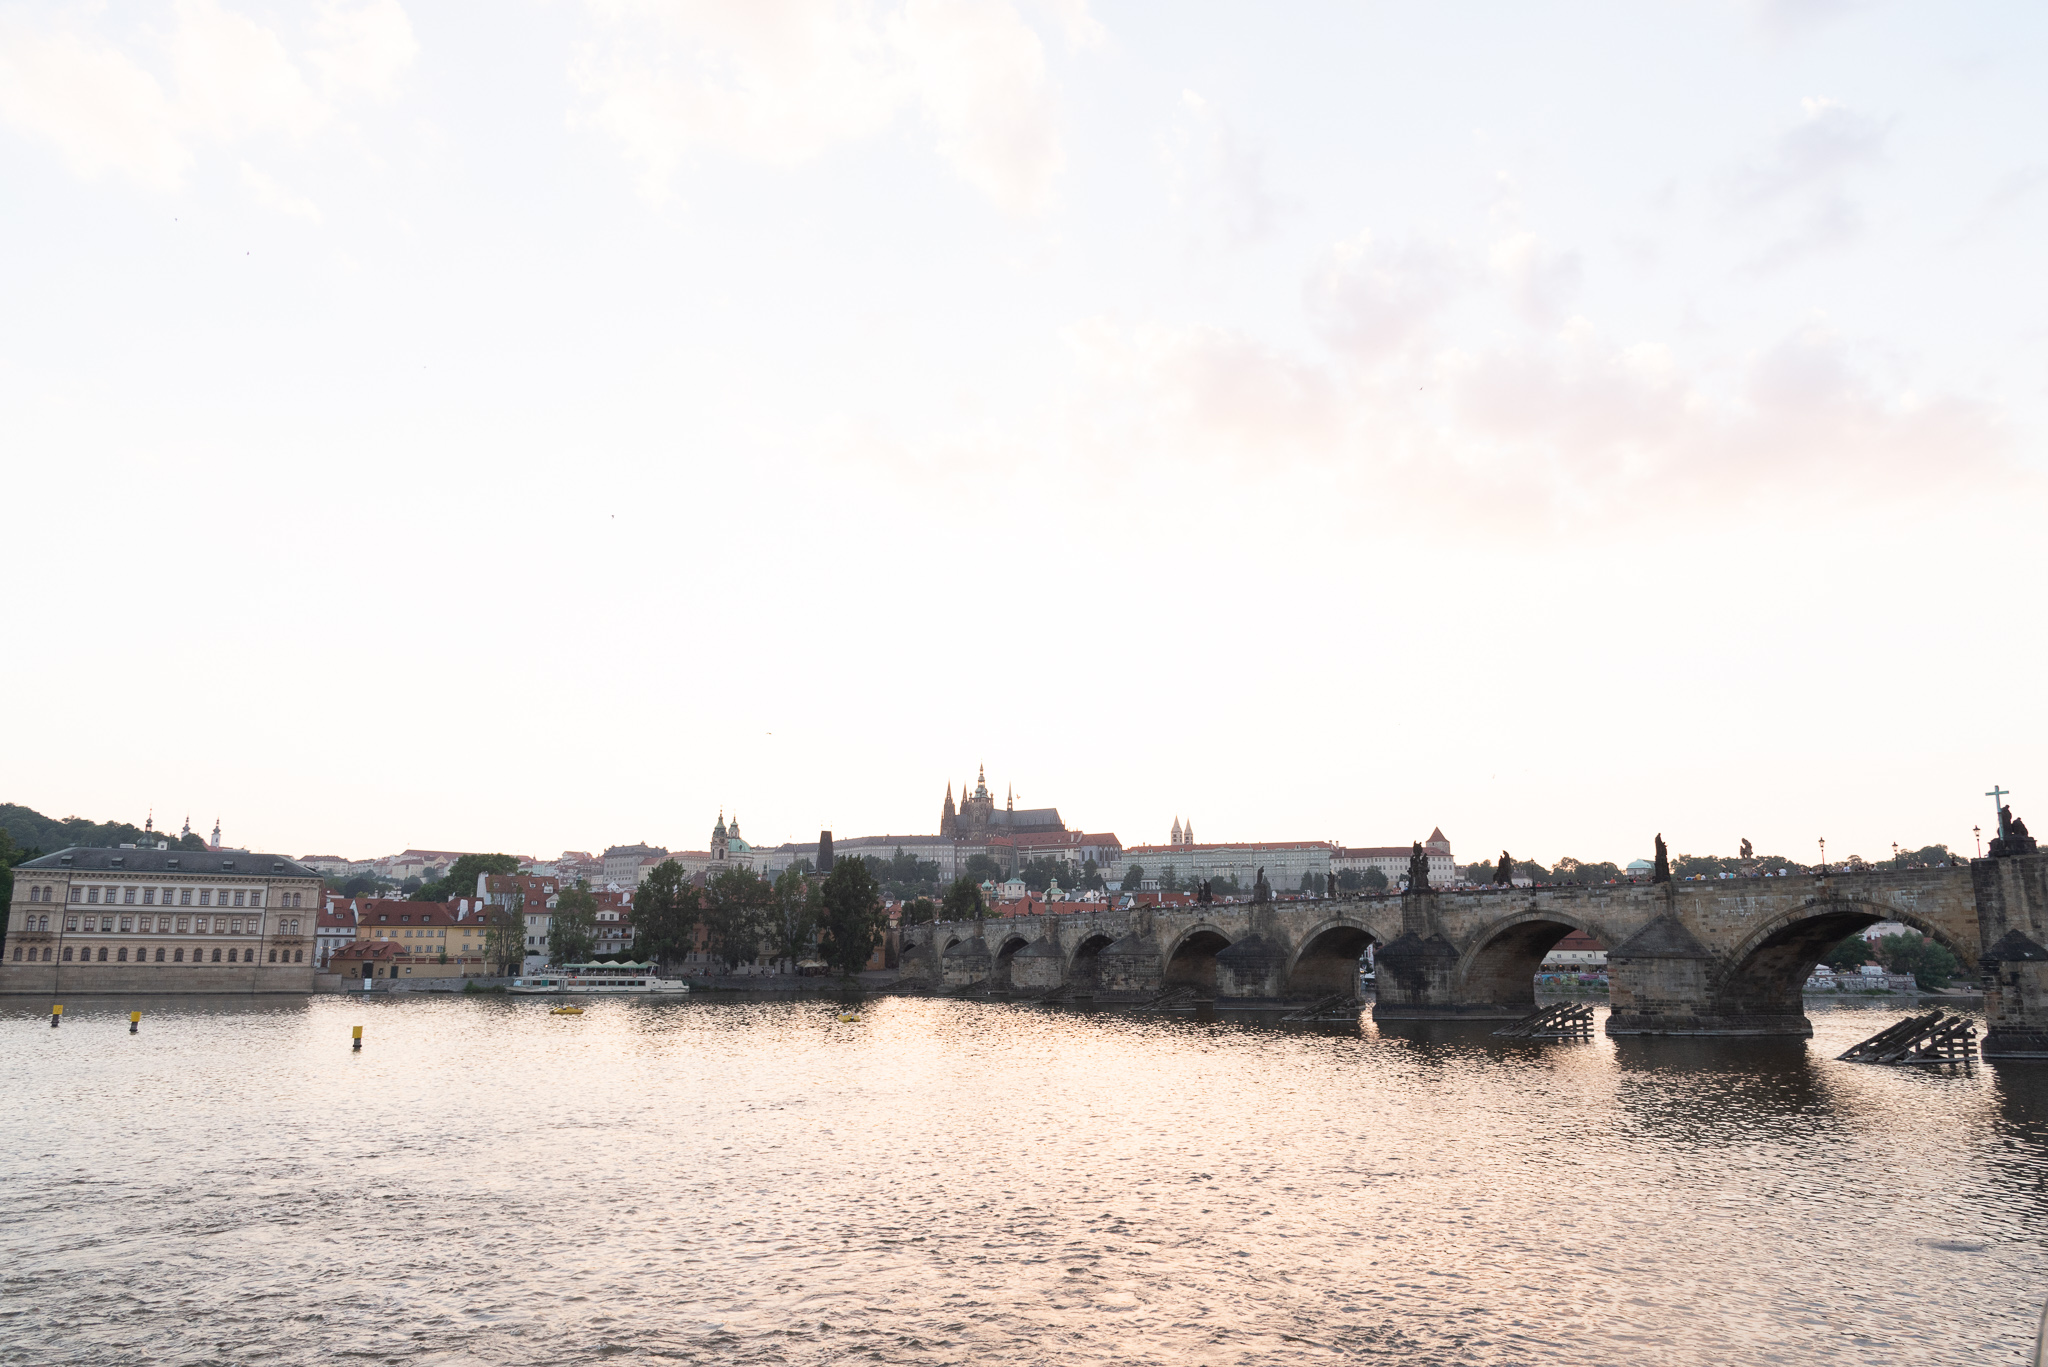
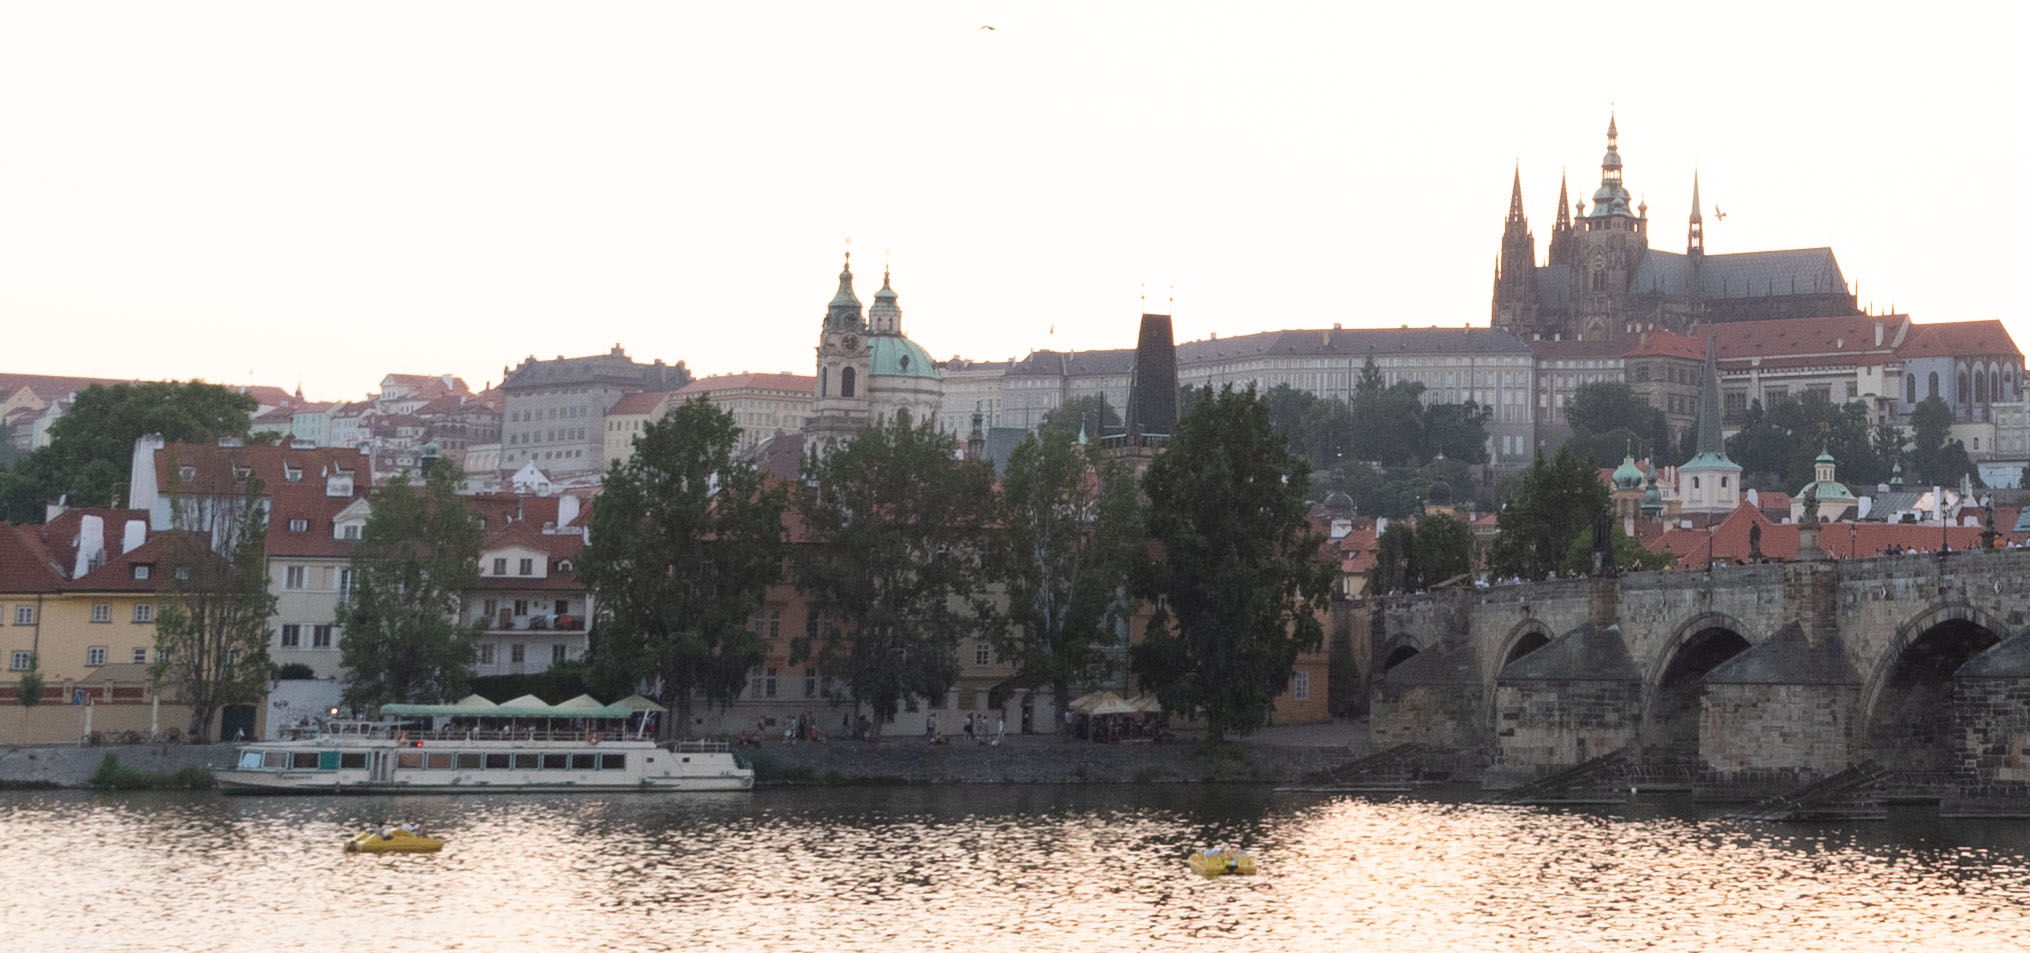
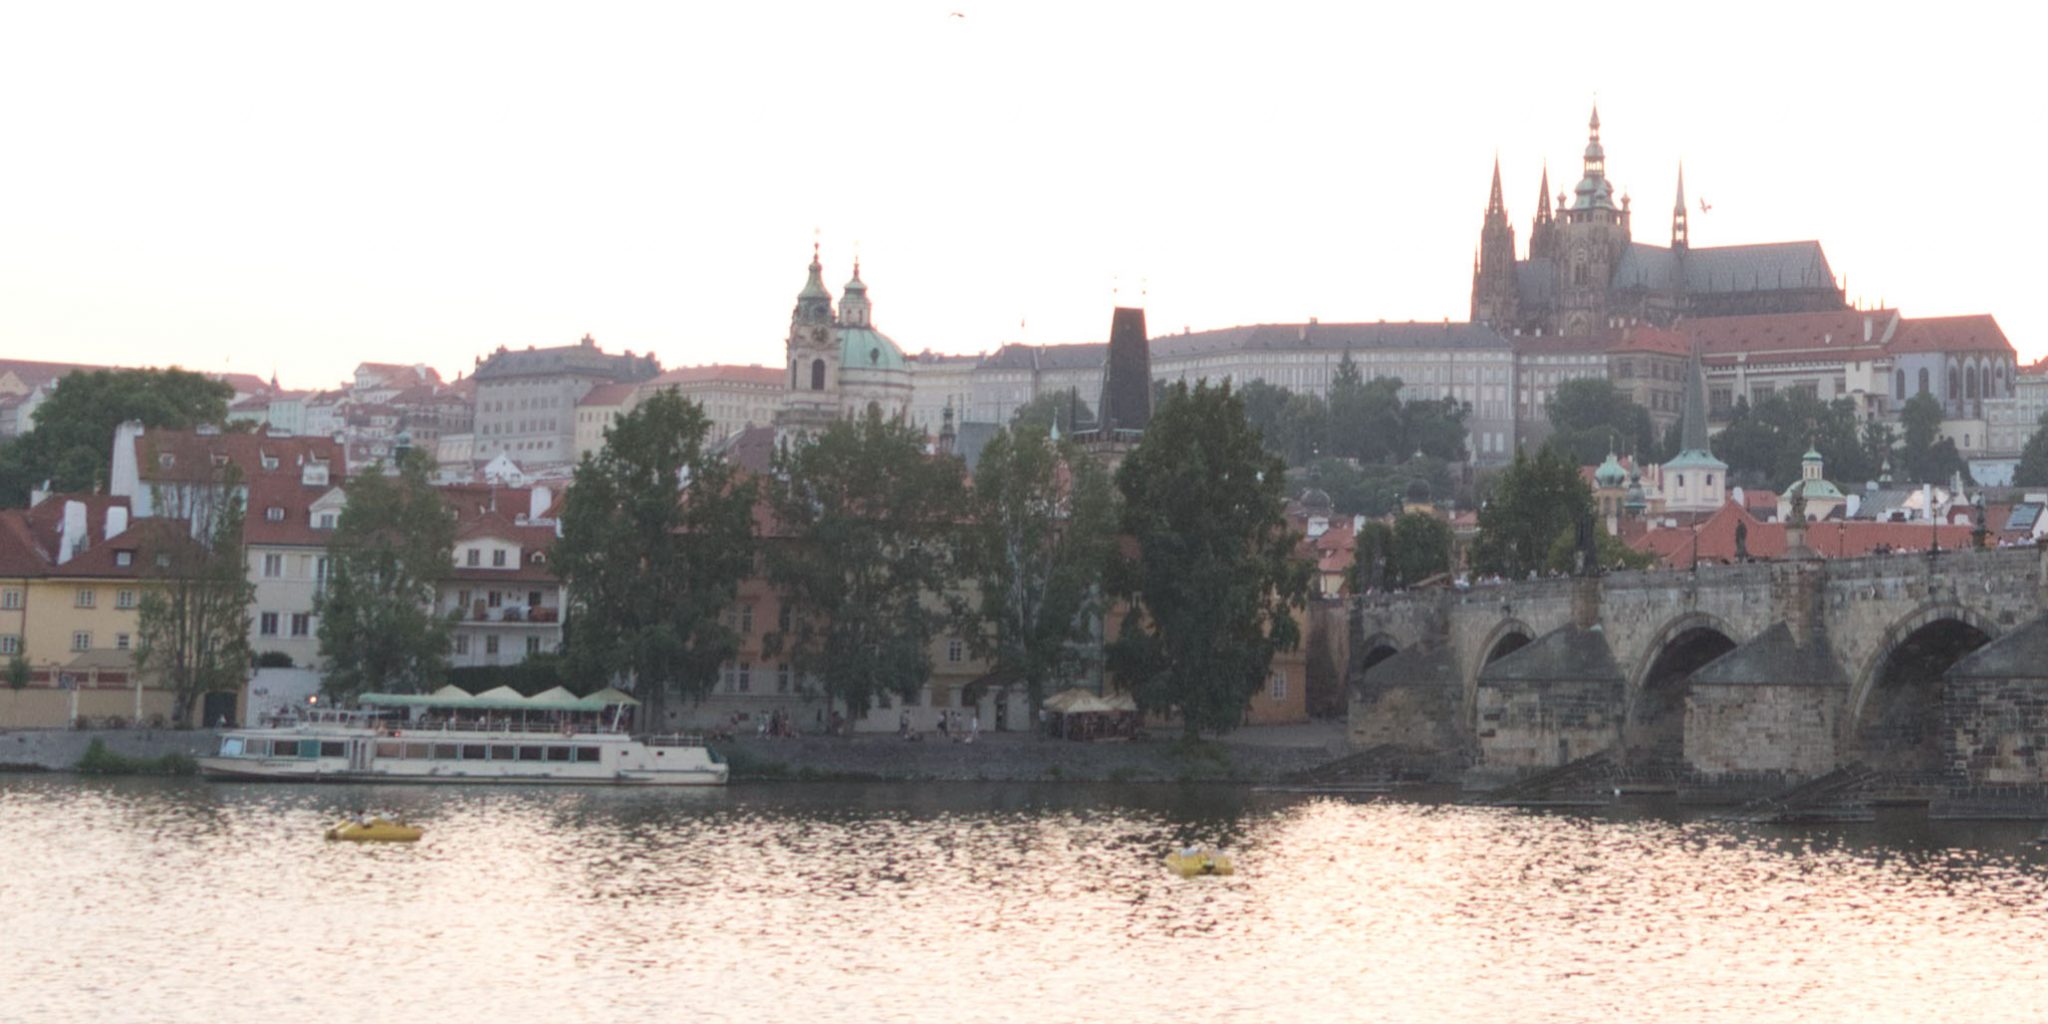
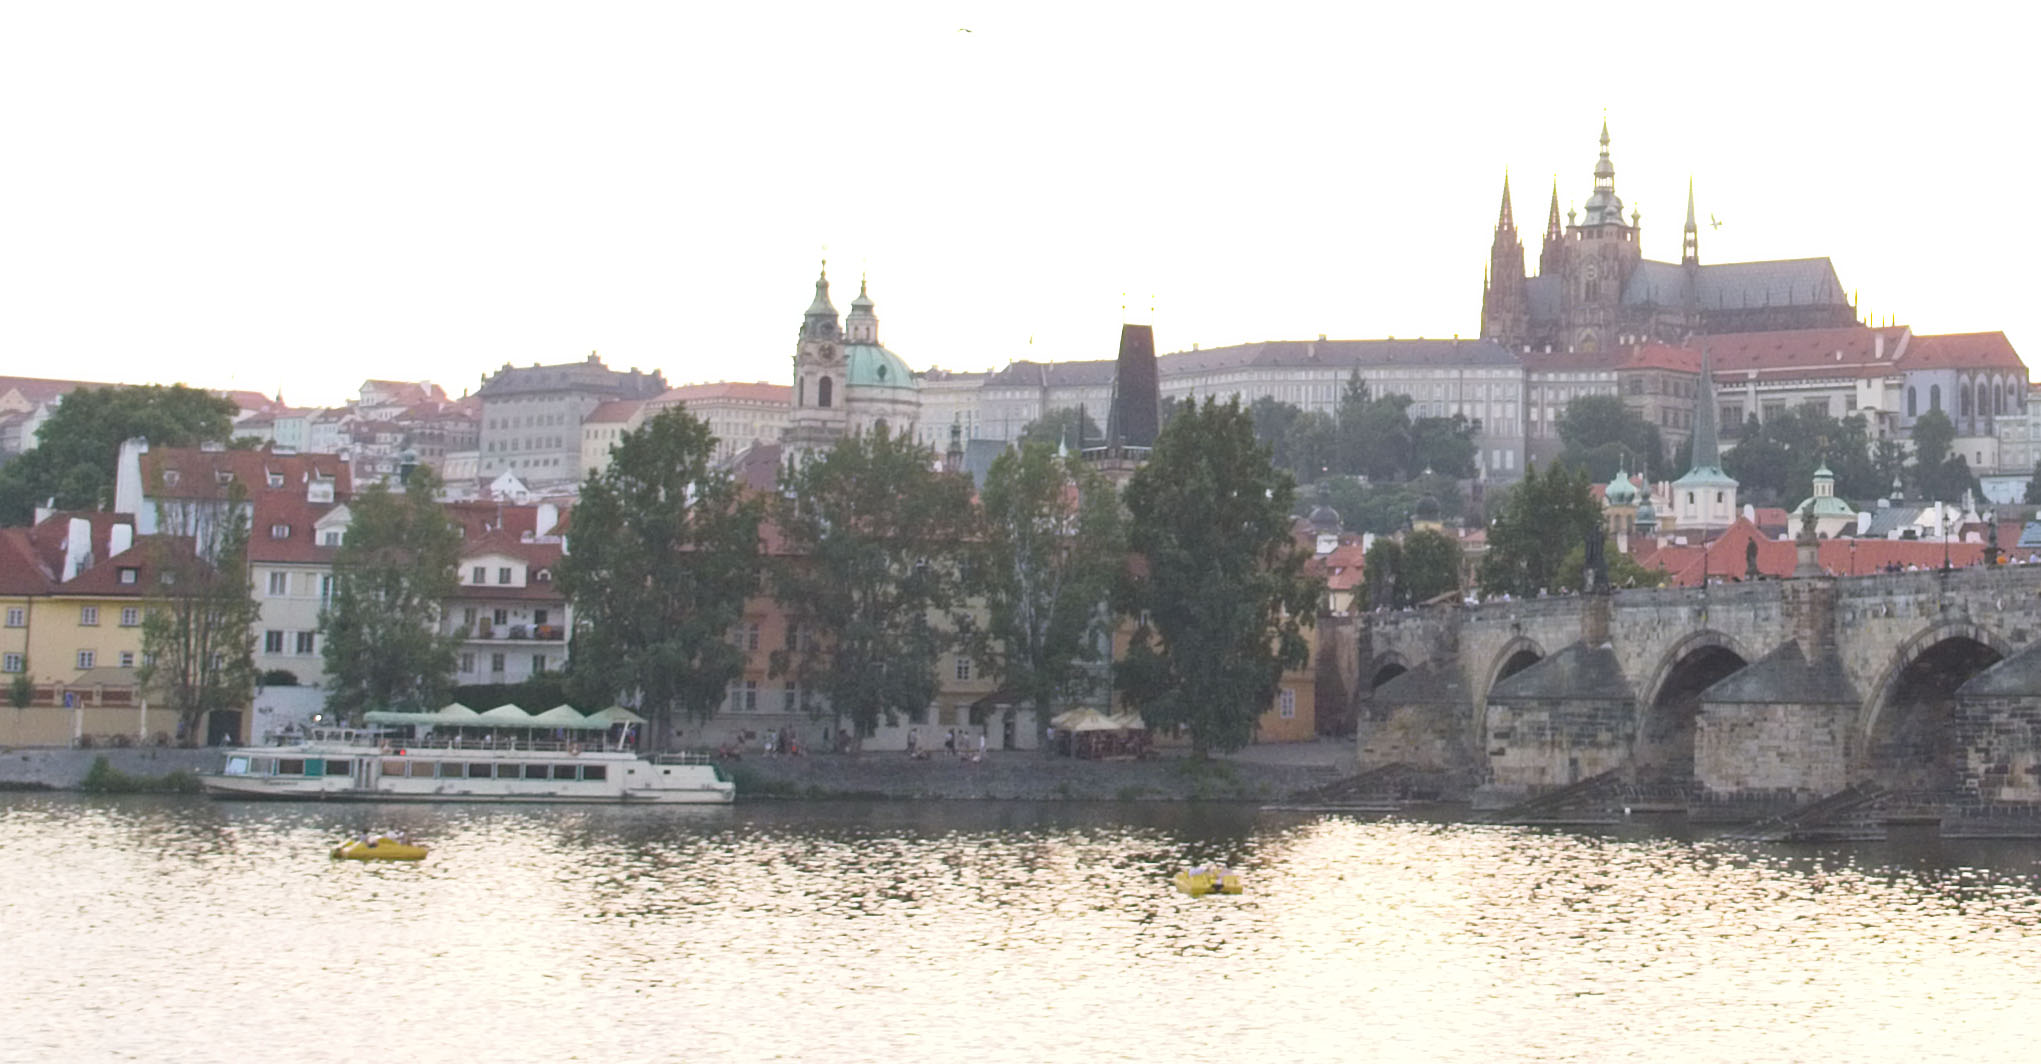
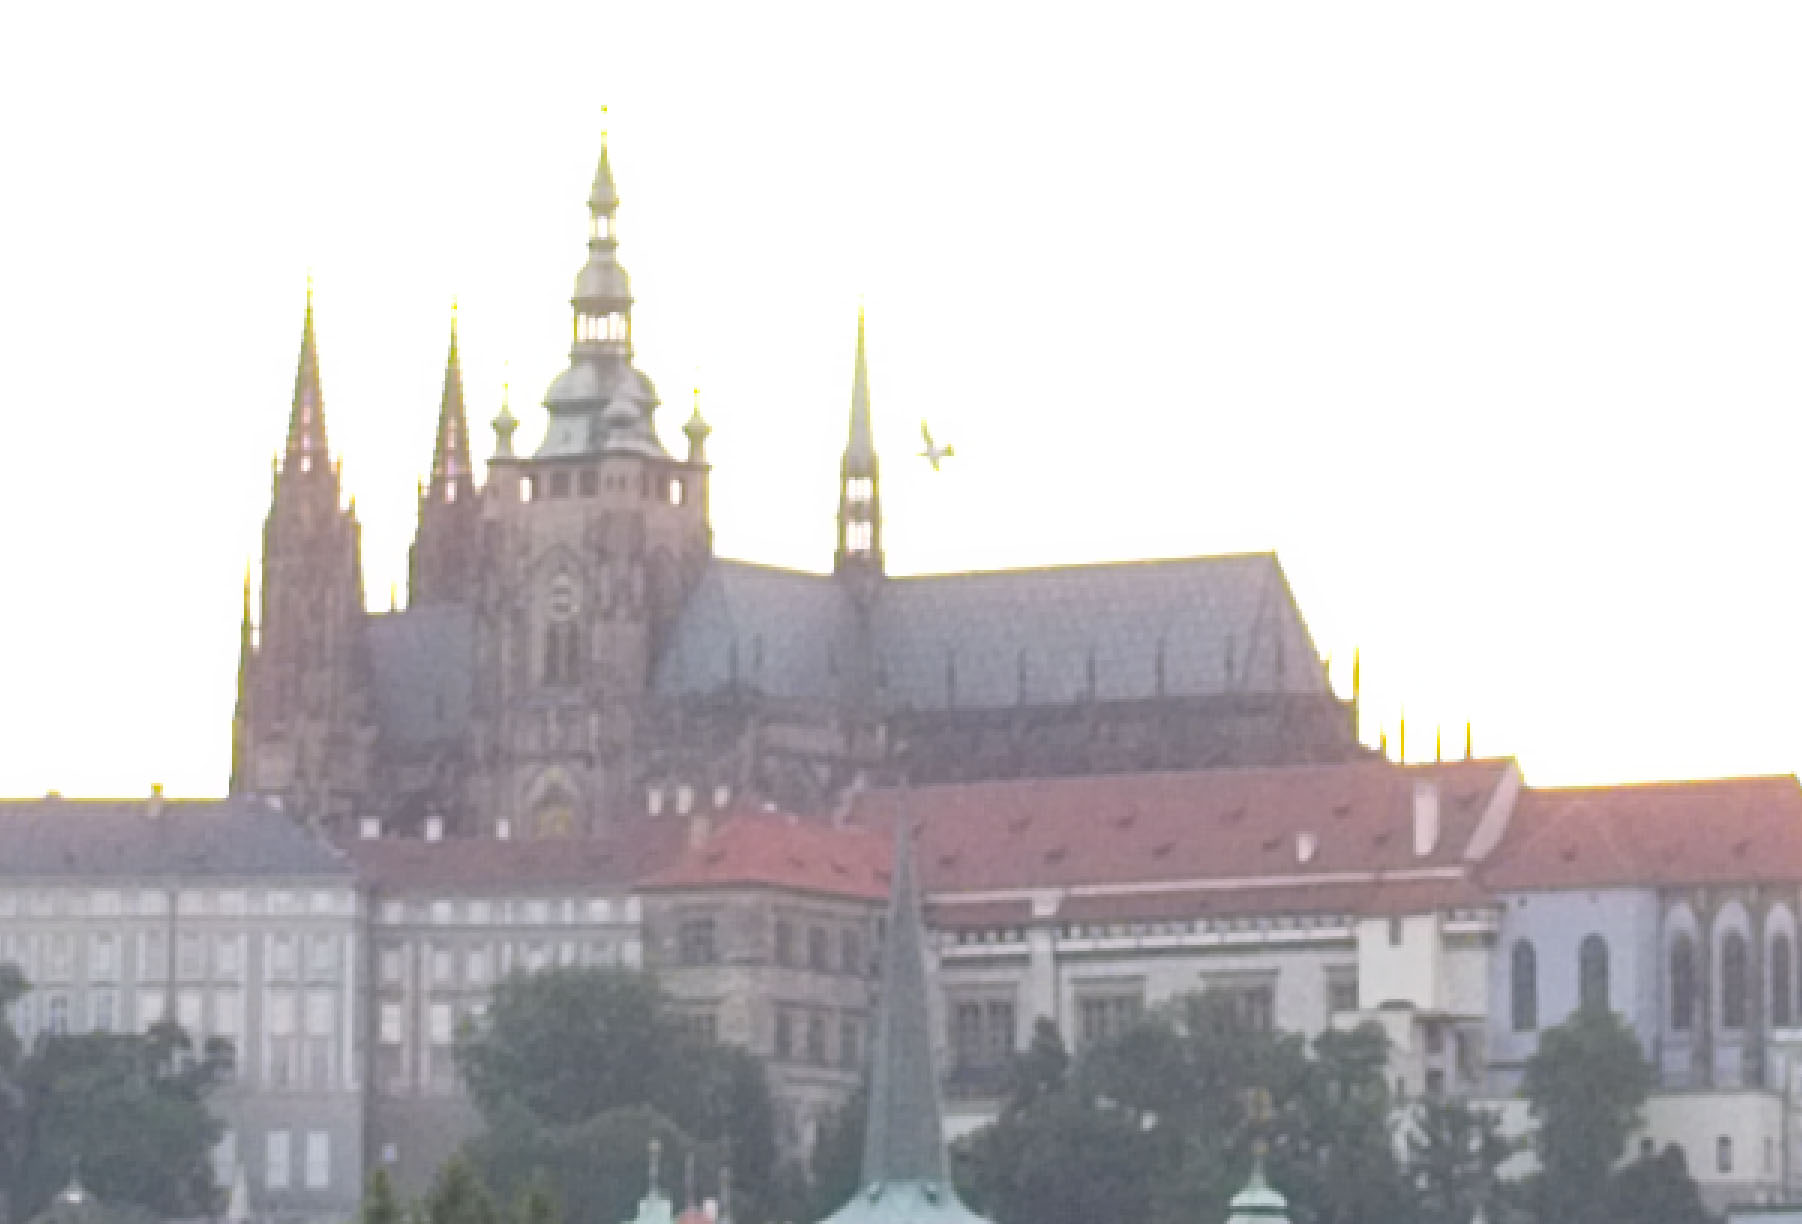
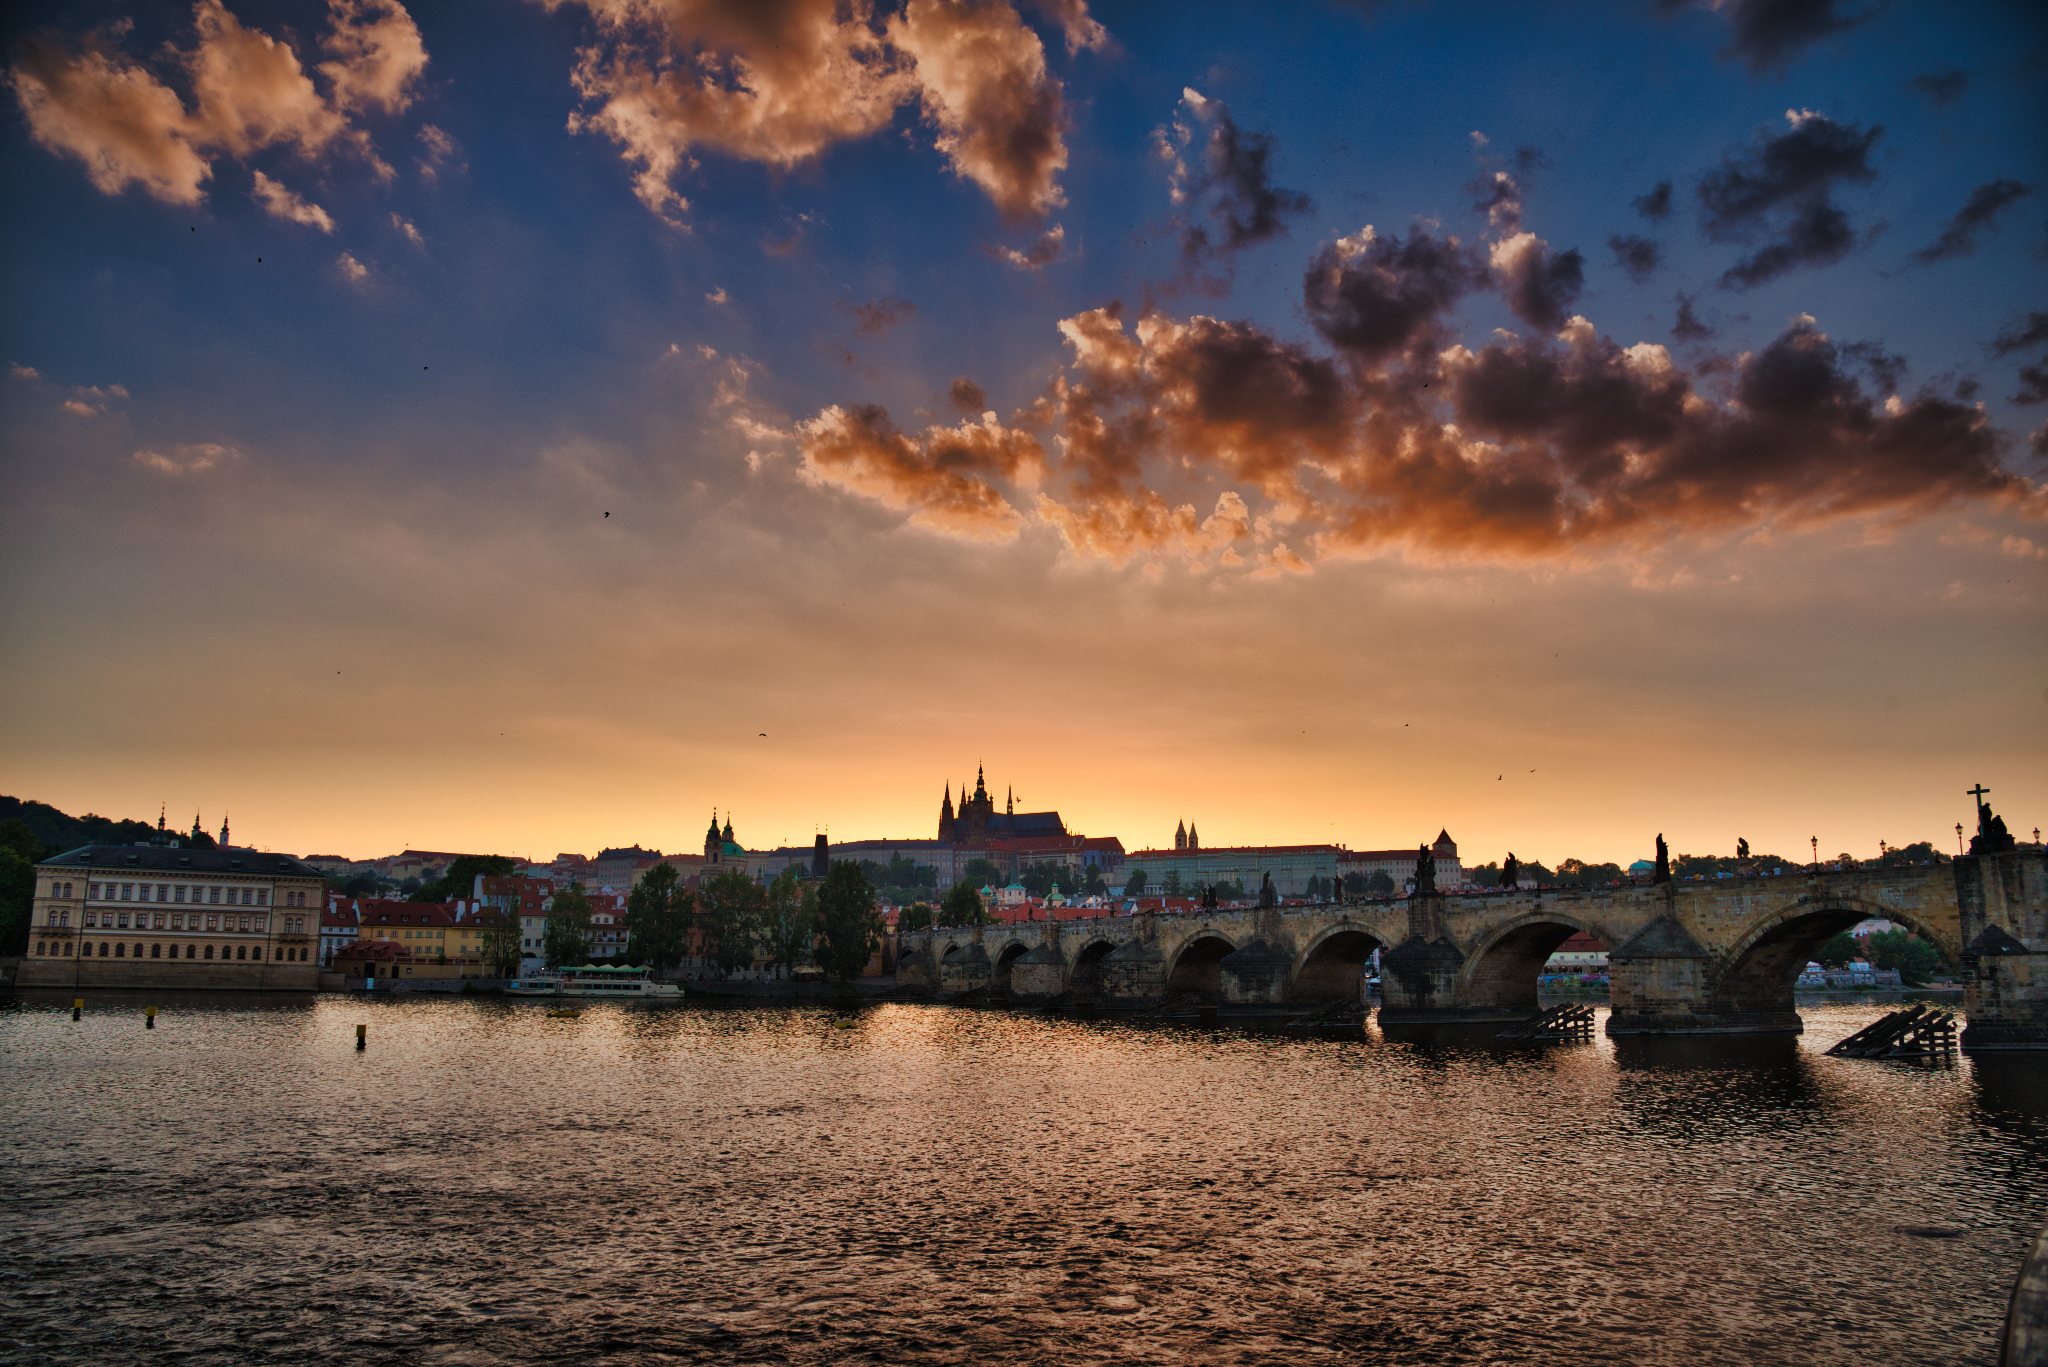
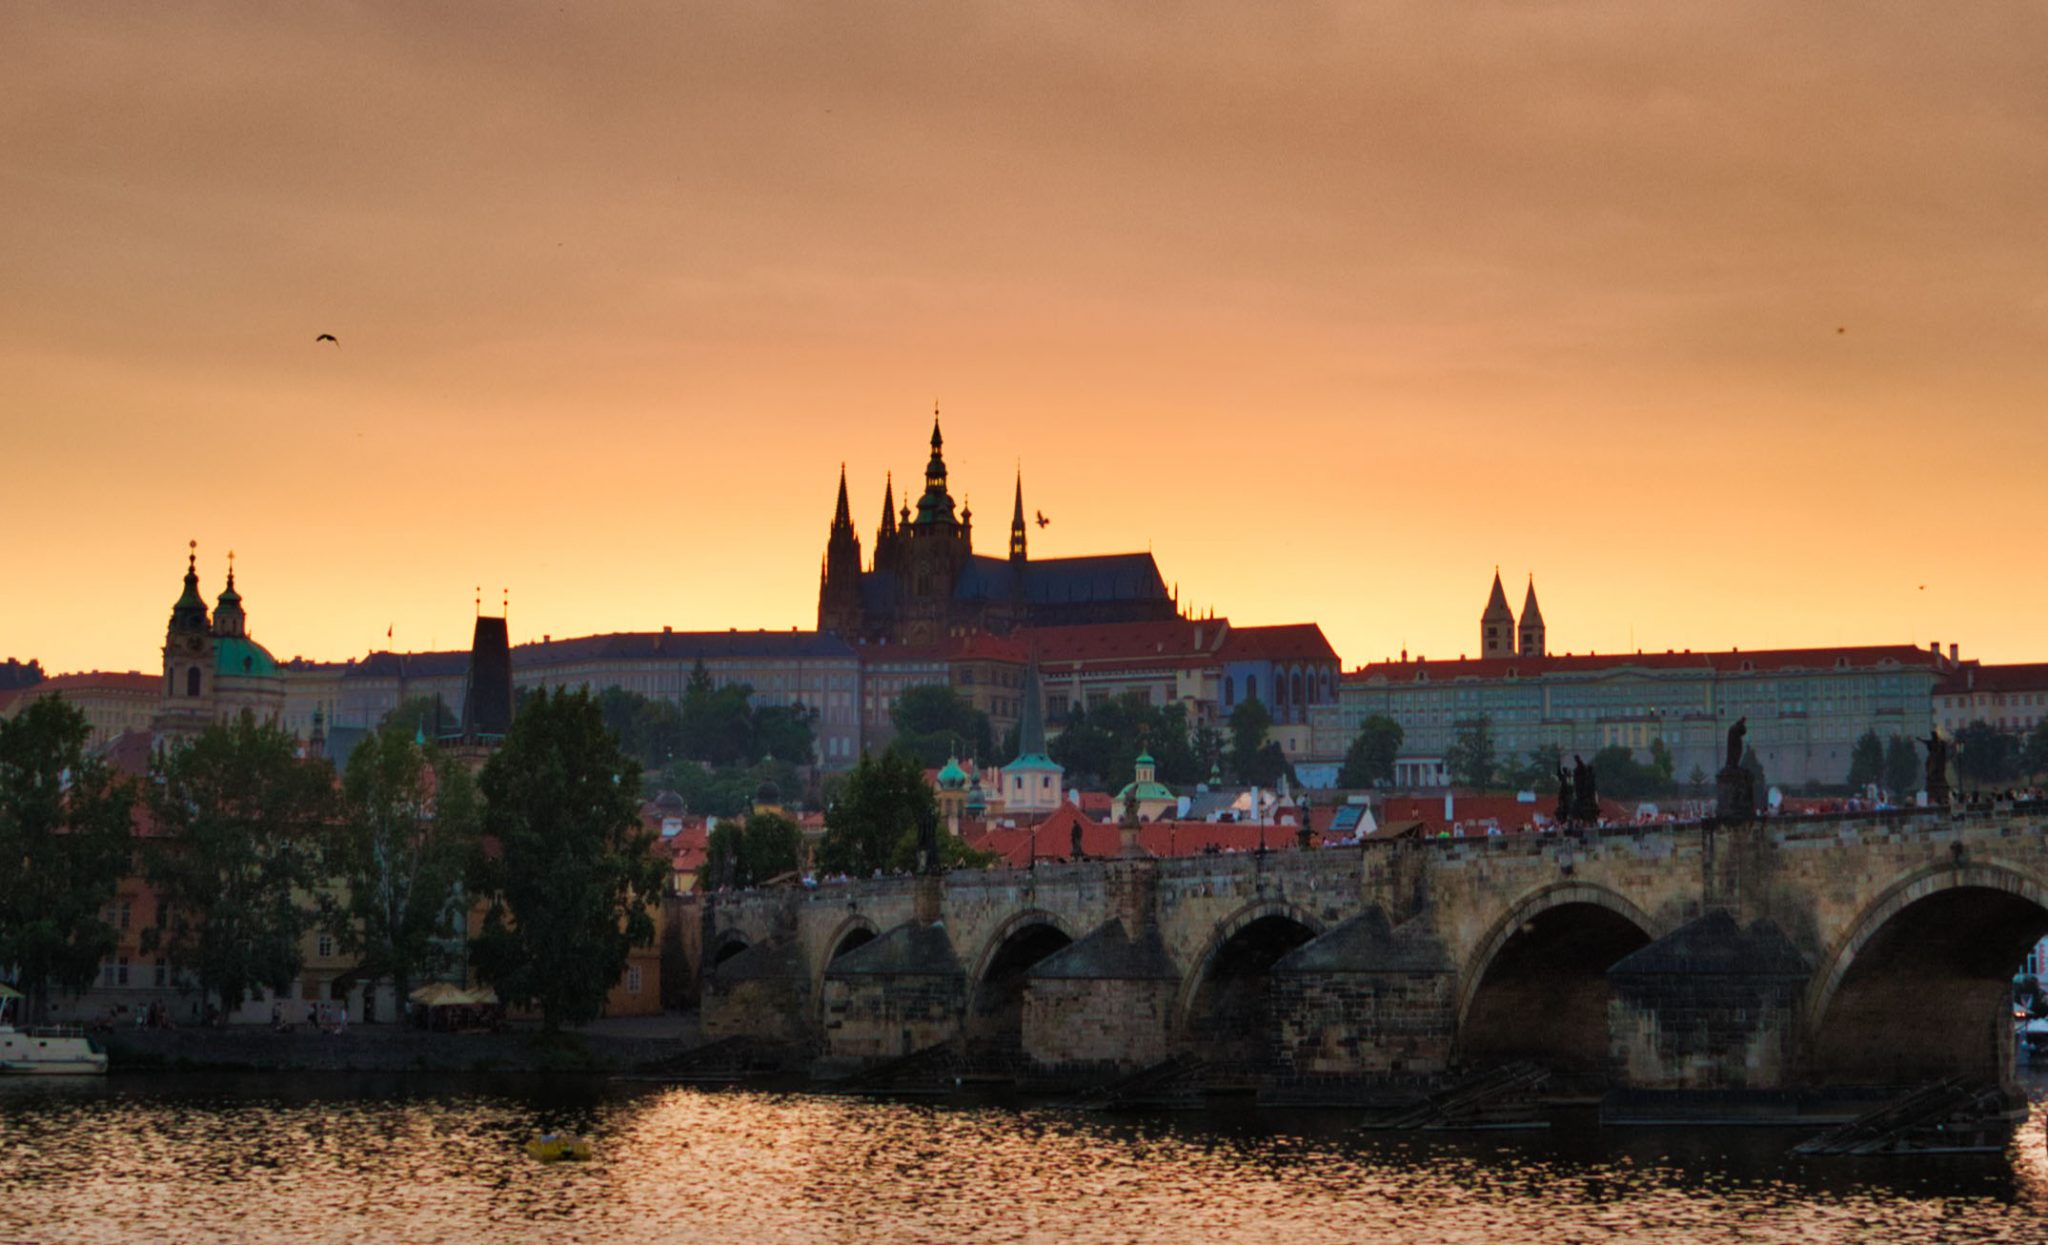
OK. So here’s the scene for today. It’s a sunset image of Prague Castle with Charles Bridge in the foreground, shot on my D750 in 2016. This is a single raw file, shot at ISO400 and properly exposed to the right (+2EV) to capture as much shadow detail as possible. No analog filters were used. I’m posting a relatively quick edit of the file – my “main” version of this scene is a stitched panorama, rather than the single frame image.
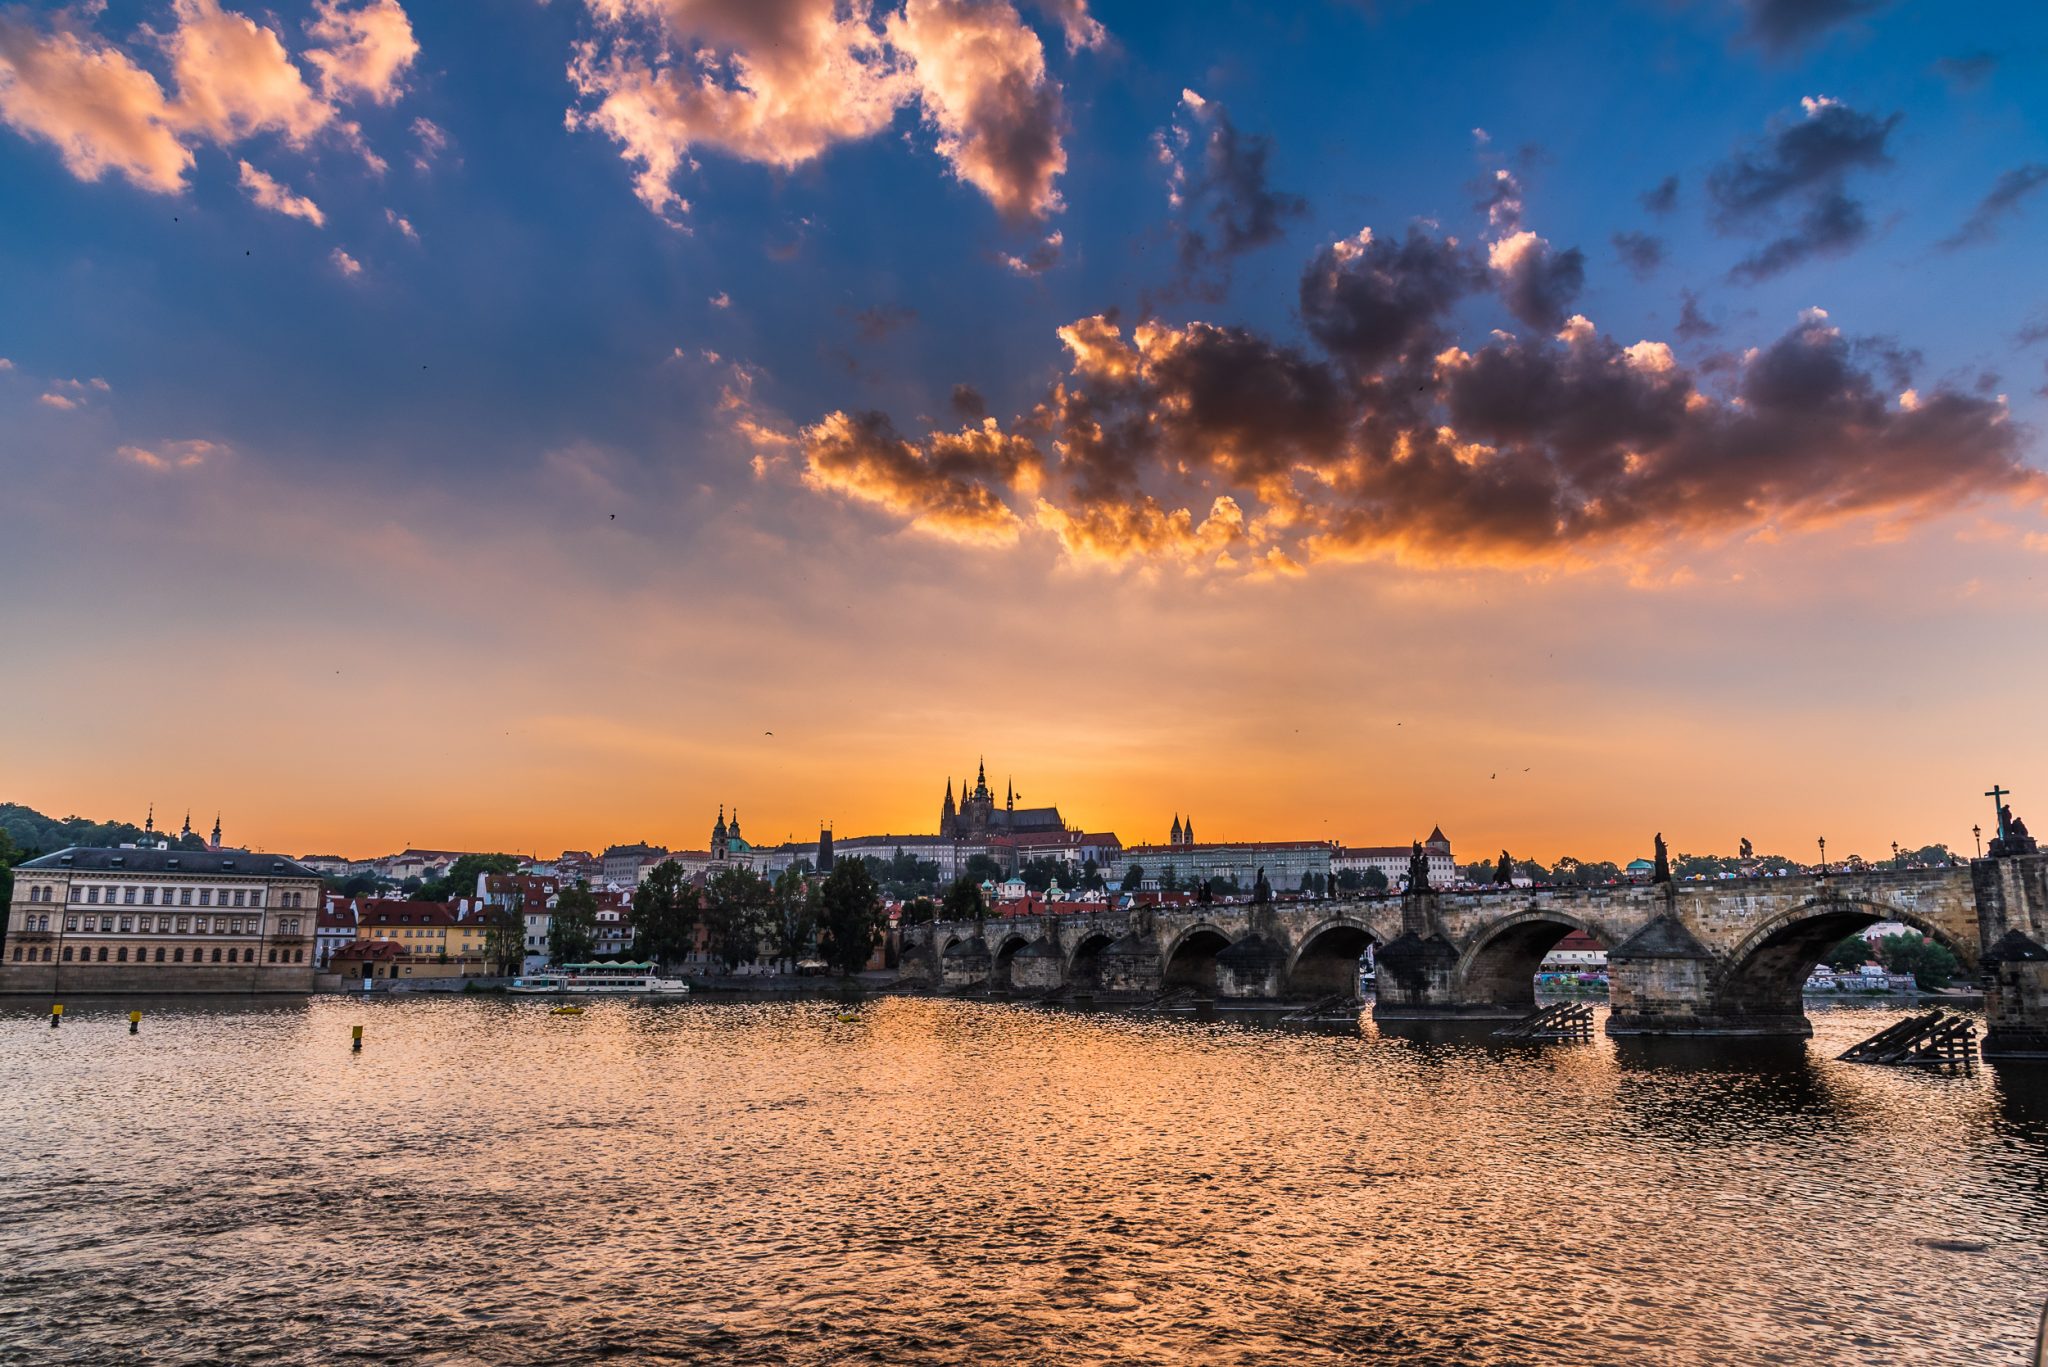
As with many sunsets, this is a scene that’s got quite a bit of dynamic range. But it’s also a scene that the 14-bit converters in most modern cameras – including the D750 – shouldn’t have a problem capturing.
So that’s the final product. Let’s start by loading the image into each of the three packages to see what we get.
First, two notes for procedural purposes:
- Where possible, I’ve exported the images directly from the programs and uploaded them. There are a few places where I needed to take screenshots (for example, to show highlight clipping, or to show 1:1 crops), and I’ll note that in the caption.
- WordPress does some silly stuff with resizing, so you may end up with a blurry-ish image. I’m saving the individual images, and I’ll put a link to all the jpgs at the bottom of the post.
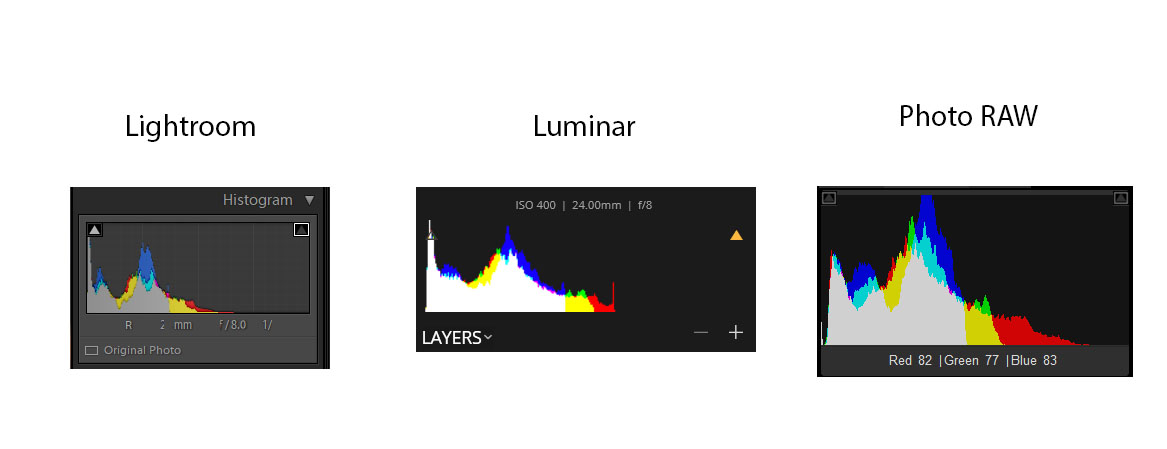
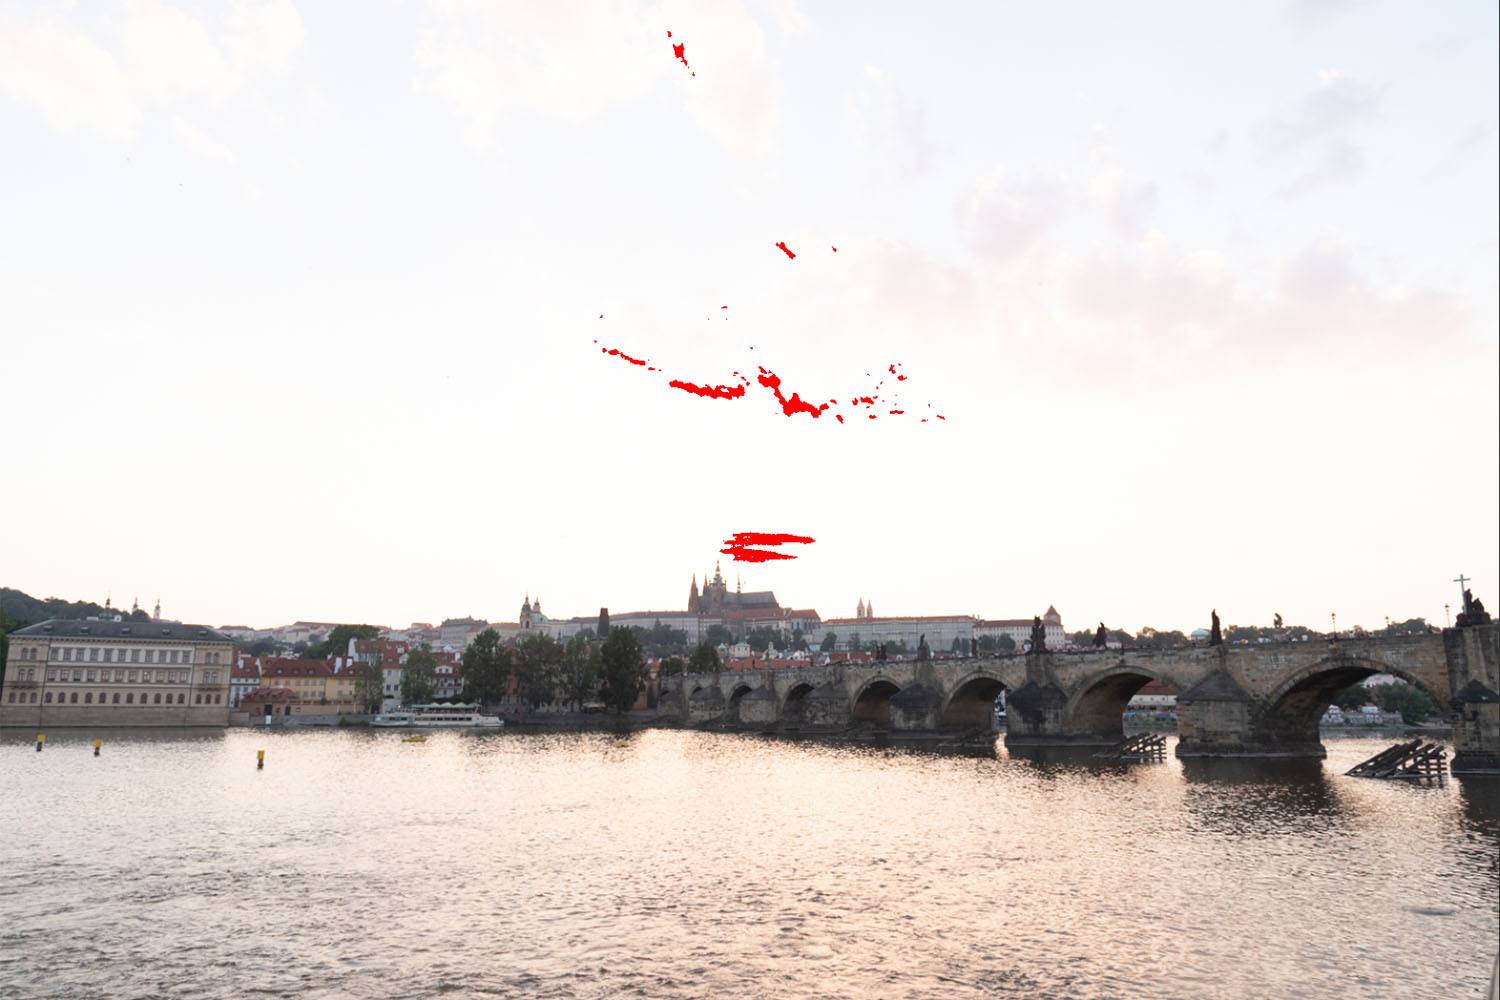
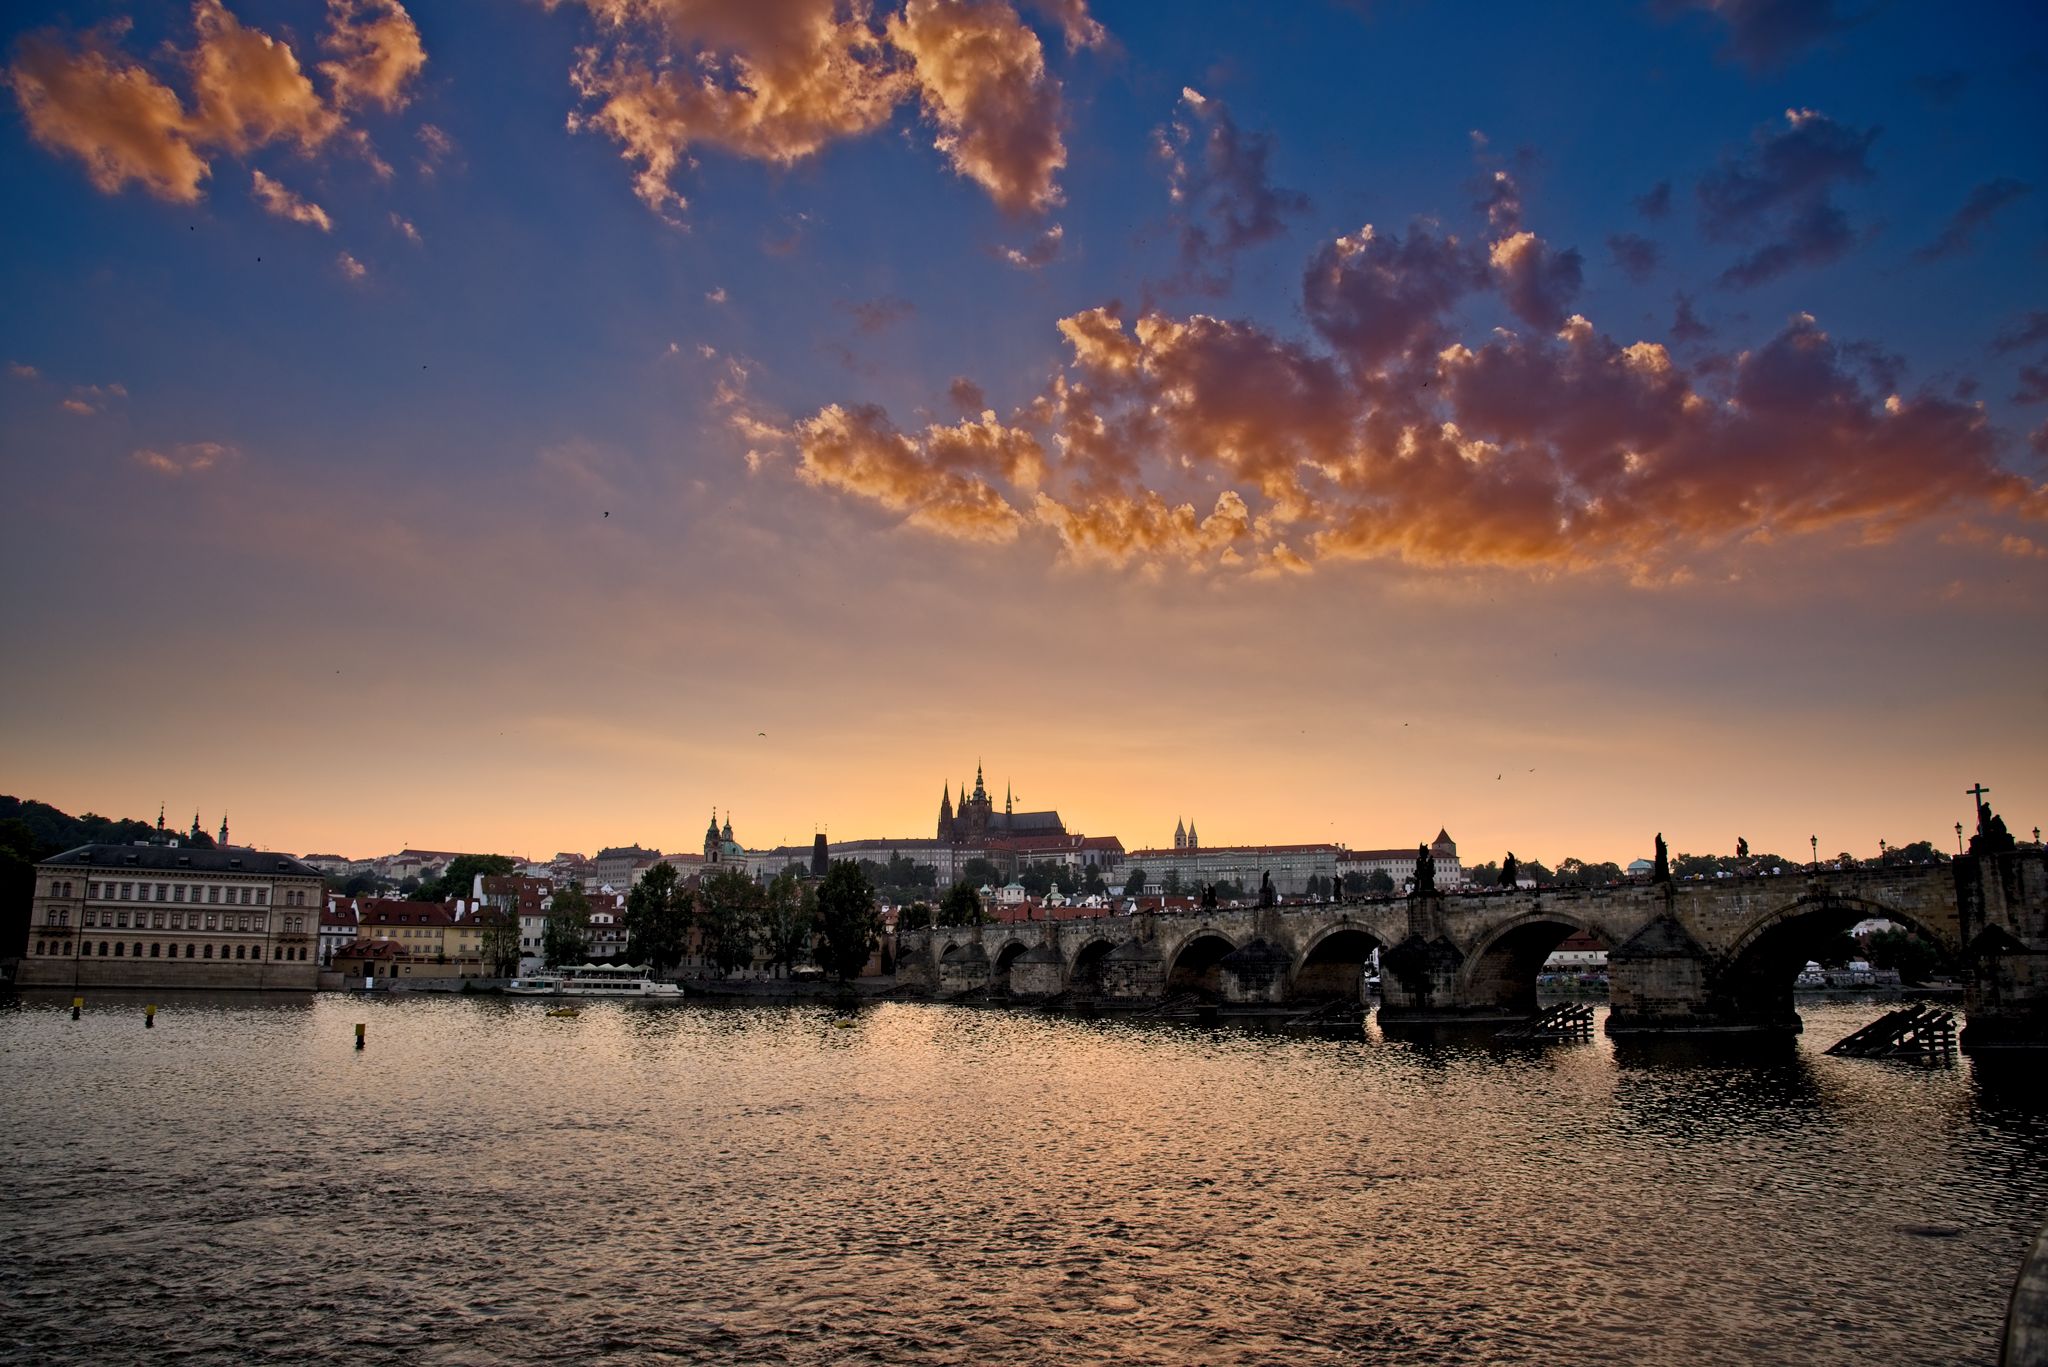
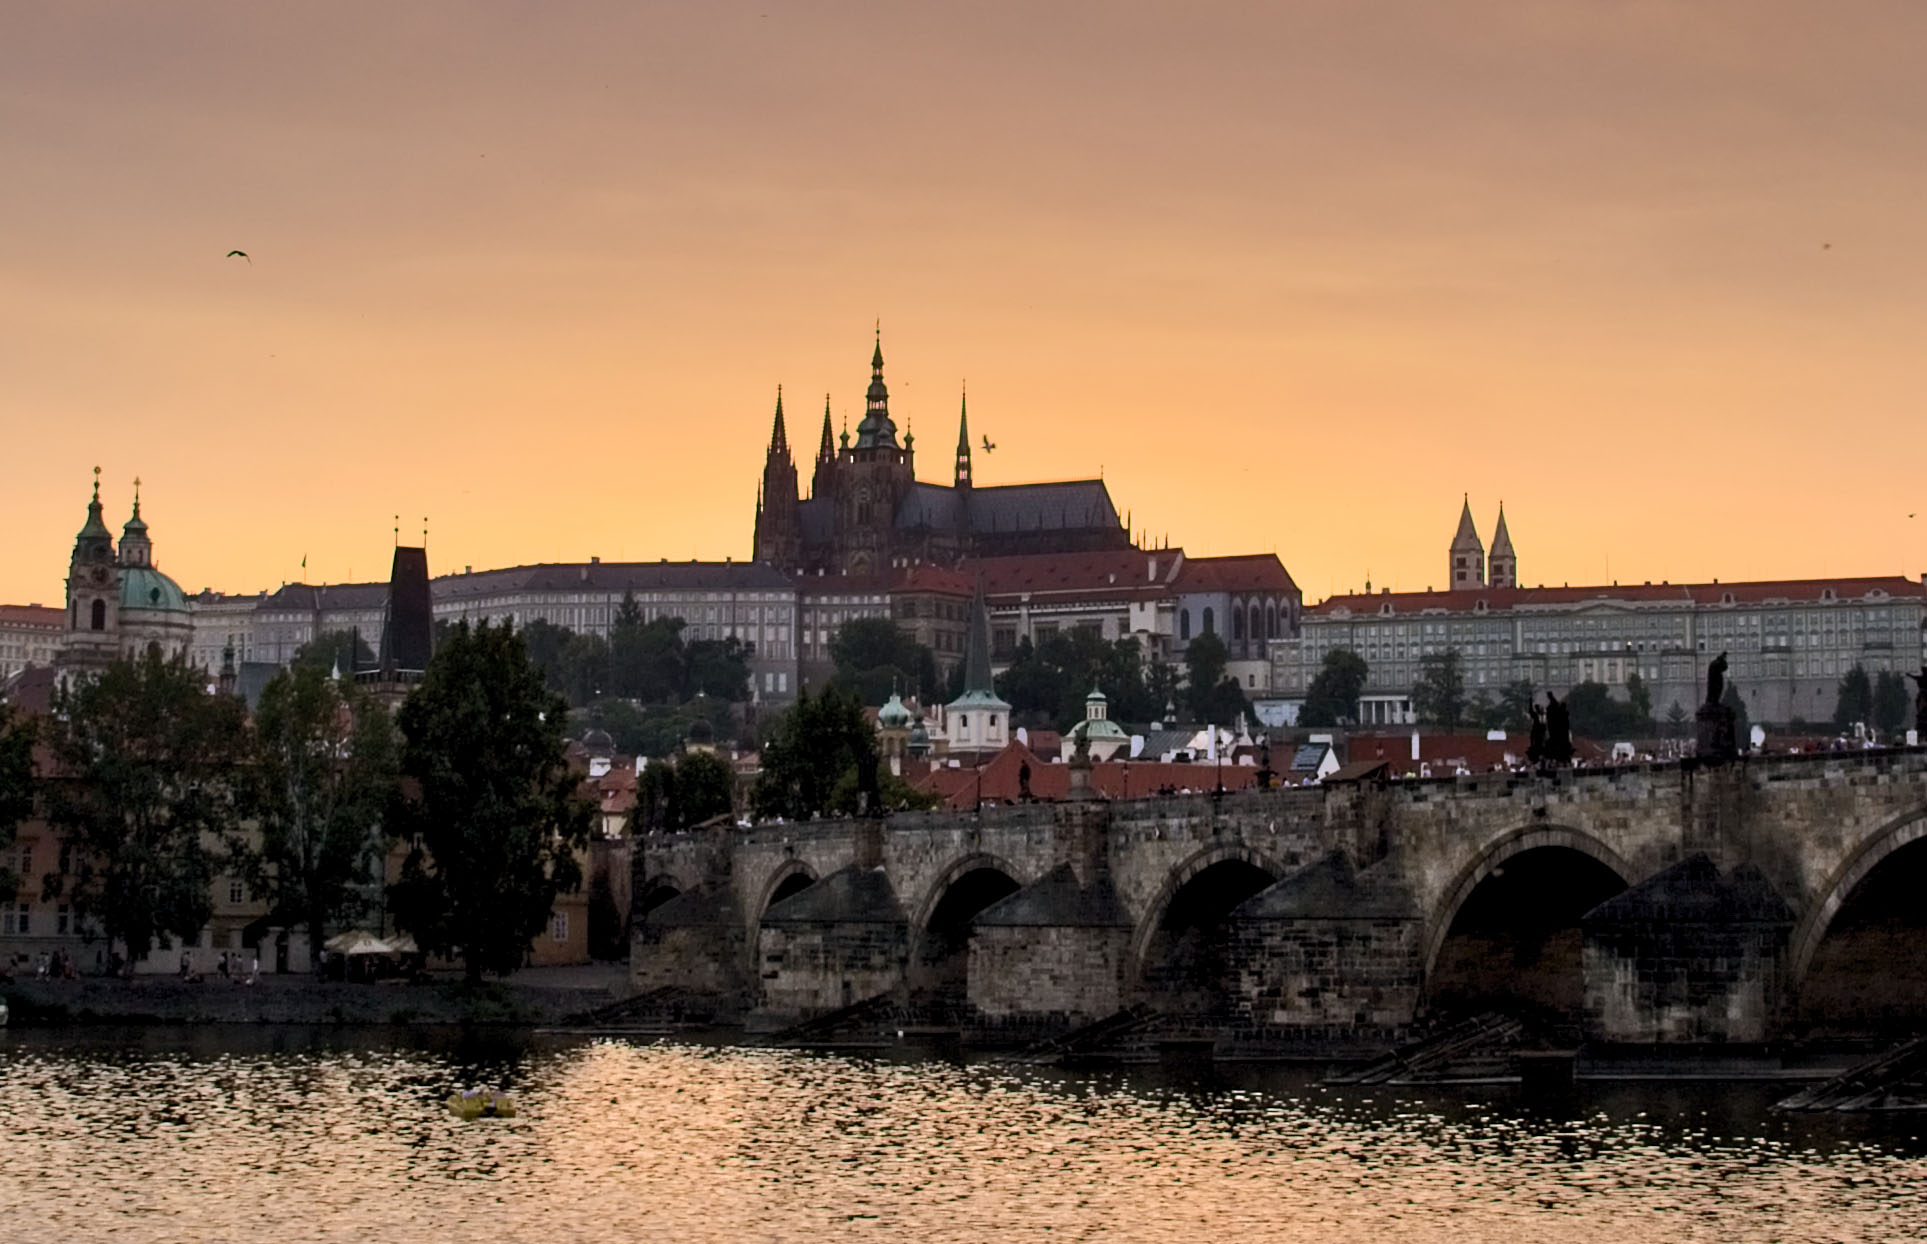
This all looks pretty reasonable, and similar between the three packages, at least on a surface level. When we dig in, though, we find something disturbing in Luminar (screenshot):
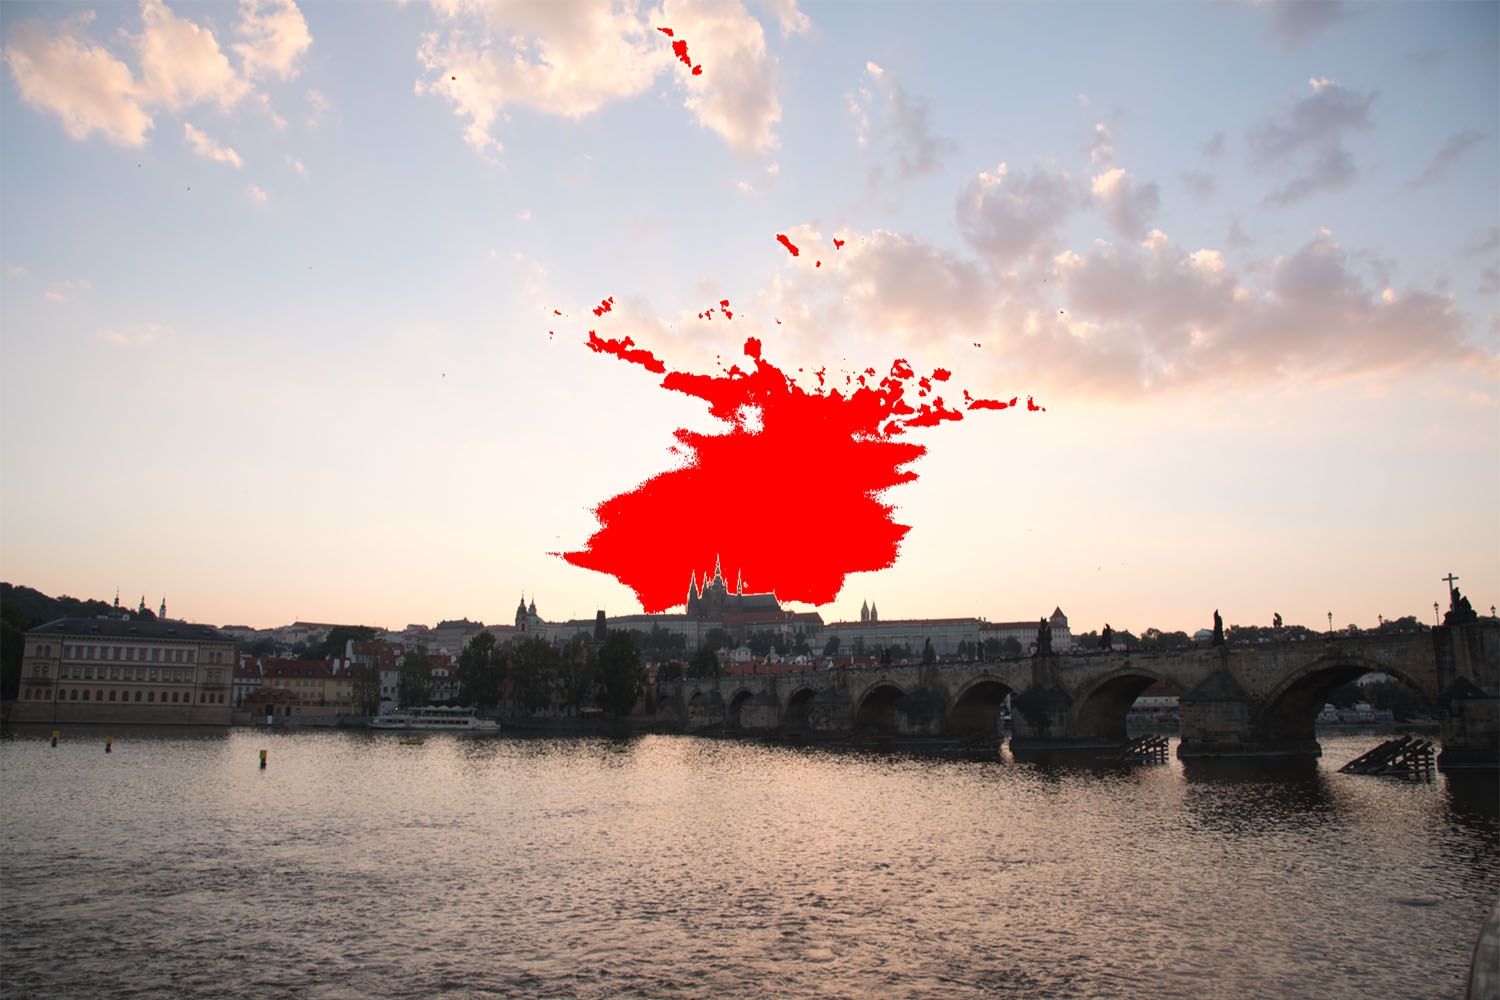
When we turn highlight clipping on, we see that Luminar’s default import settings are clipping large portions of the sky. Photo RAW has a tiny amount clipped, but not really enough to bother with or complain about. Of the three packages, Lightroom is the only one whose default demosaic leaves plenty of headroom, and clearly shows that the file is not clipped. Analysis of the actual raw file itself shows that none of the values are clipped: D750 raw files have four channels (RGB+G). The maximum values for those four channels on this image are [12,123, 13,777 6,918 13,854], with a clip value of 15,520. In other words, this isn’t a problem with the underlying file. Adobe’s got it right in this case. Luminar (and to a lesser extent Photo RAW) are either demosaicing or applying default settings in such a way that they are clipping the highlights in the default rendering.
Next, let’s see how all three packages do when we bring down the global exposure of the image. Because the three programs apply local adjustments quite differenly, I want to spend the first part of the post focusing on global adjustments. I’m not trying to use all of the fancy bells and whistles in each package – rather, I’m trying to get a baseline comparison for how the raw engines themselves perform before applying all the bells and whistles. If the converter can’t get the basics right, all of the filtering applied after the fact will be less effective. For the next set of images, all I’m doing is taking the exposure slider for each package and moving it to -3EV. Remember: this photo is exposed to the right by about 2EV, so this should identify any areas where the raw converter clipped our channels when it wasn’t supposed to.
Again, things look somewhat similar on the surface, but there’s an interesting twist when looking at the histograms:
Lightroom and Photo RAW both have a similar looking red channel histogram, but Luminar does not. Specifically, it has a spike on the right side – an indication that the red channel was clipped, and subsequently scaled down. This appears to be something associated with the camera profile selection, as you can see in the following image.
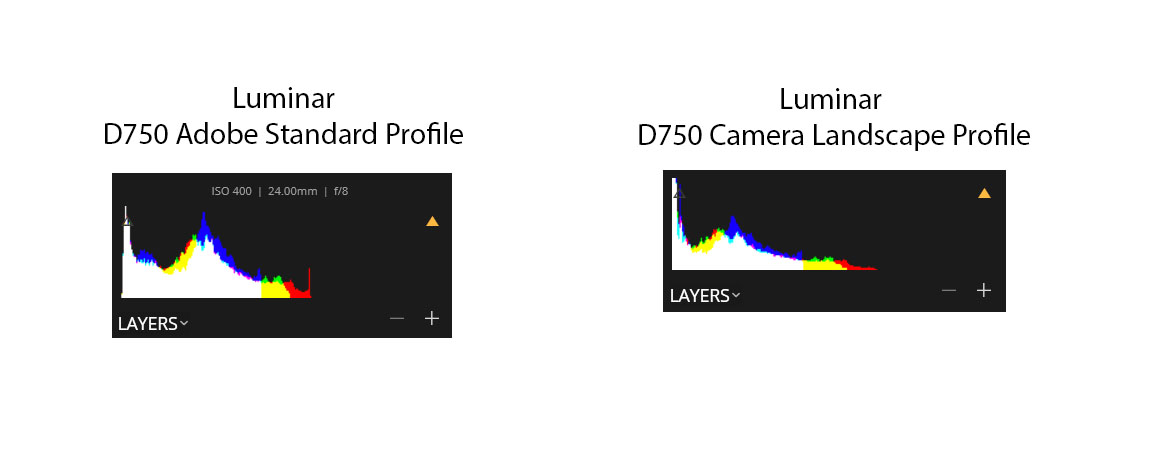
What this basically says is that certain camera profiles – including the Luminar default profile – may clip channels that are exposed to the right when they shouldn’t and may not deal properly with those channels when the exposure values are reduced. This is basically the same result as overexposing the shot in camera. The peak on the right is an indication that detail in the red channel highlights has been lost permanently. It can be “fixed” by switching to another camera profile, but this may indicate a deeper problem with Luminar’s raw processing path. (Note: I loaded the same image into Skylum’s other flagship product, Aurora HDR 2018. Aurora does enough processing to the image that it’s hard to say whether the channel is clipping after the tone map. It’s possible that Luminar and Aurora use a different raw engine, or it’s possible that Aurora uses a default profile that didn’t clip. In any case, results from Aurora were inconclusive.)
To be fair, the effect of this is not extremely obvious in this particular image, but it’s still concerning. It might be especially concerning if, for example, you had a camera that didn’t have great profile support in Luminar. This particular image doesn’t have a ton of highlights, especially for a sunset image. While I haven’t processed a lot of other images in Luminar with this level of scrutiny, I suspect there are other images for which this would matter more.
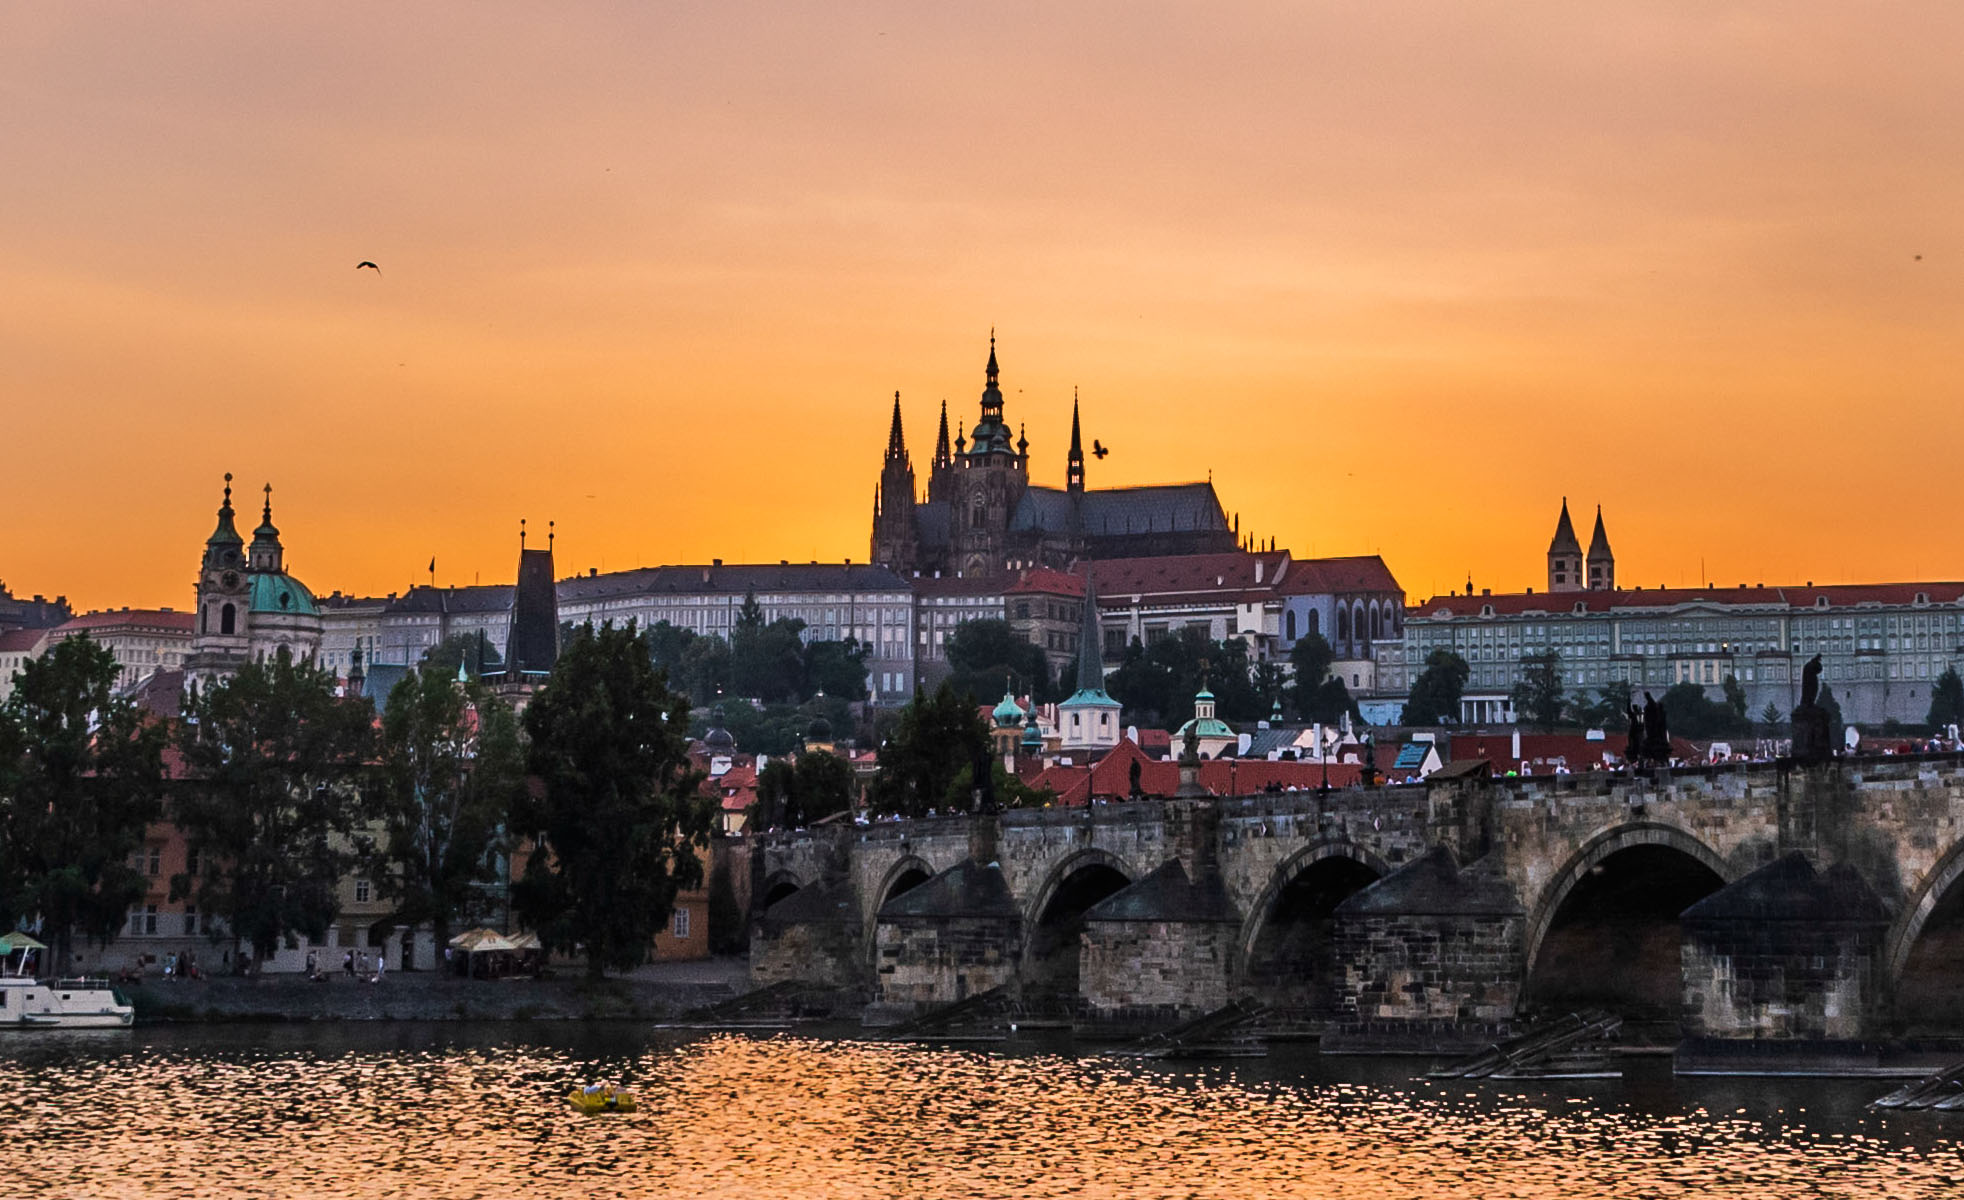
Now let’s go the other direction and try to see how they do in the shadows. For this, I’m still using only the exposure slider, and I’ve dialed things up to 1.5EV in each program. Here’s what we get:

Now we can start to see some differences. First, while the sky looks bright now in all three, Lightroom retains significantly more detail in the brightest parts of the images:
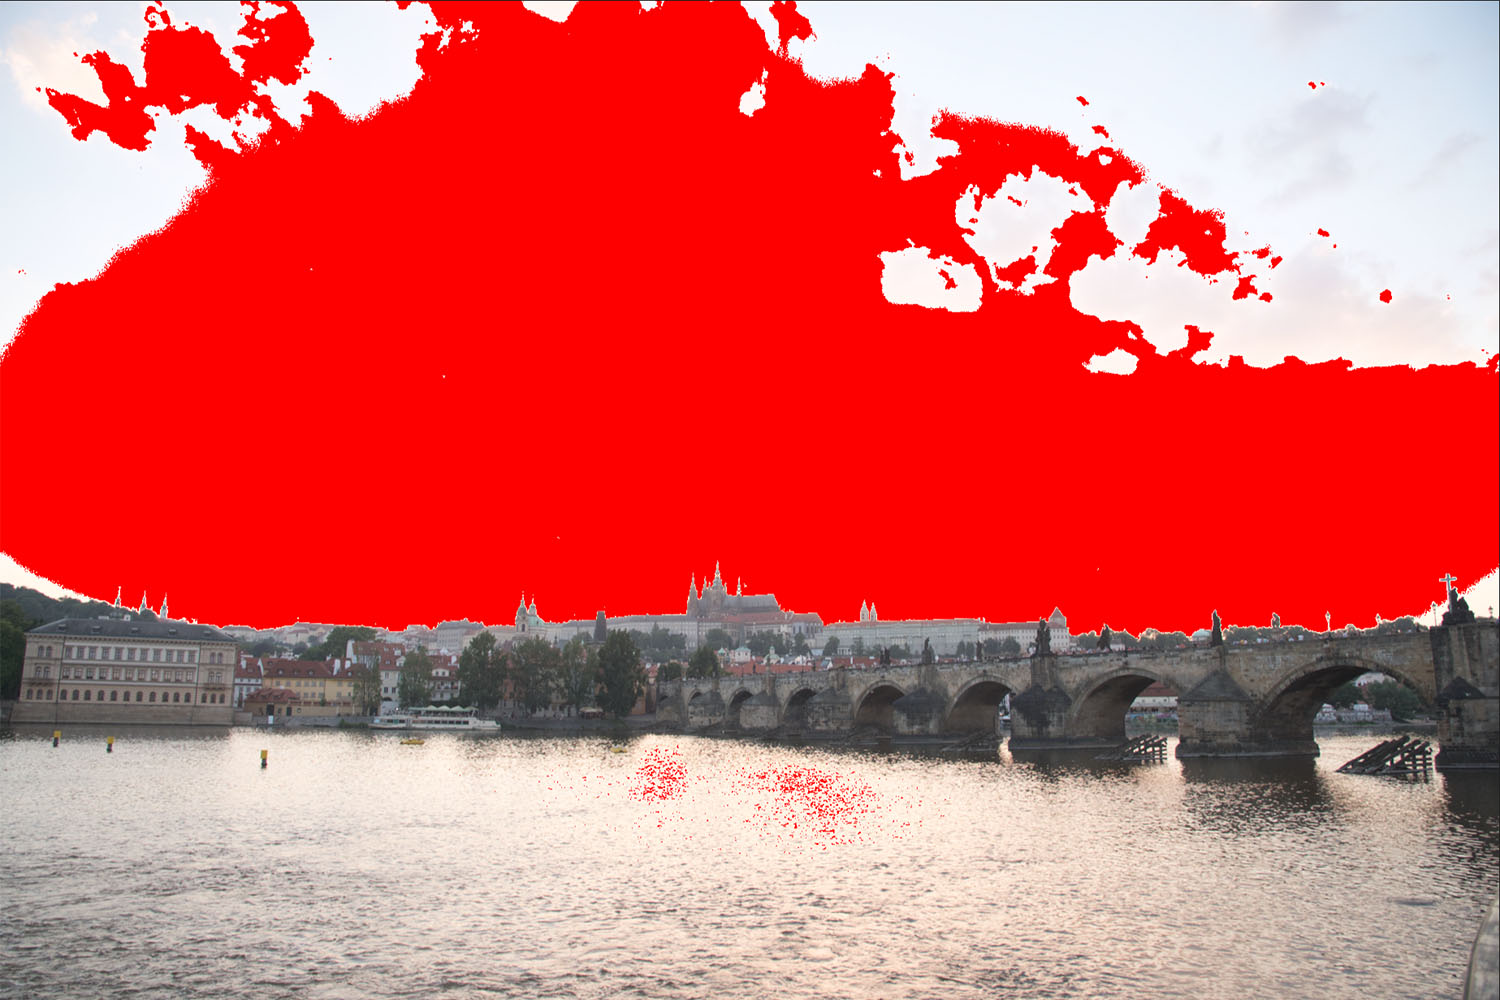
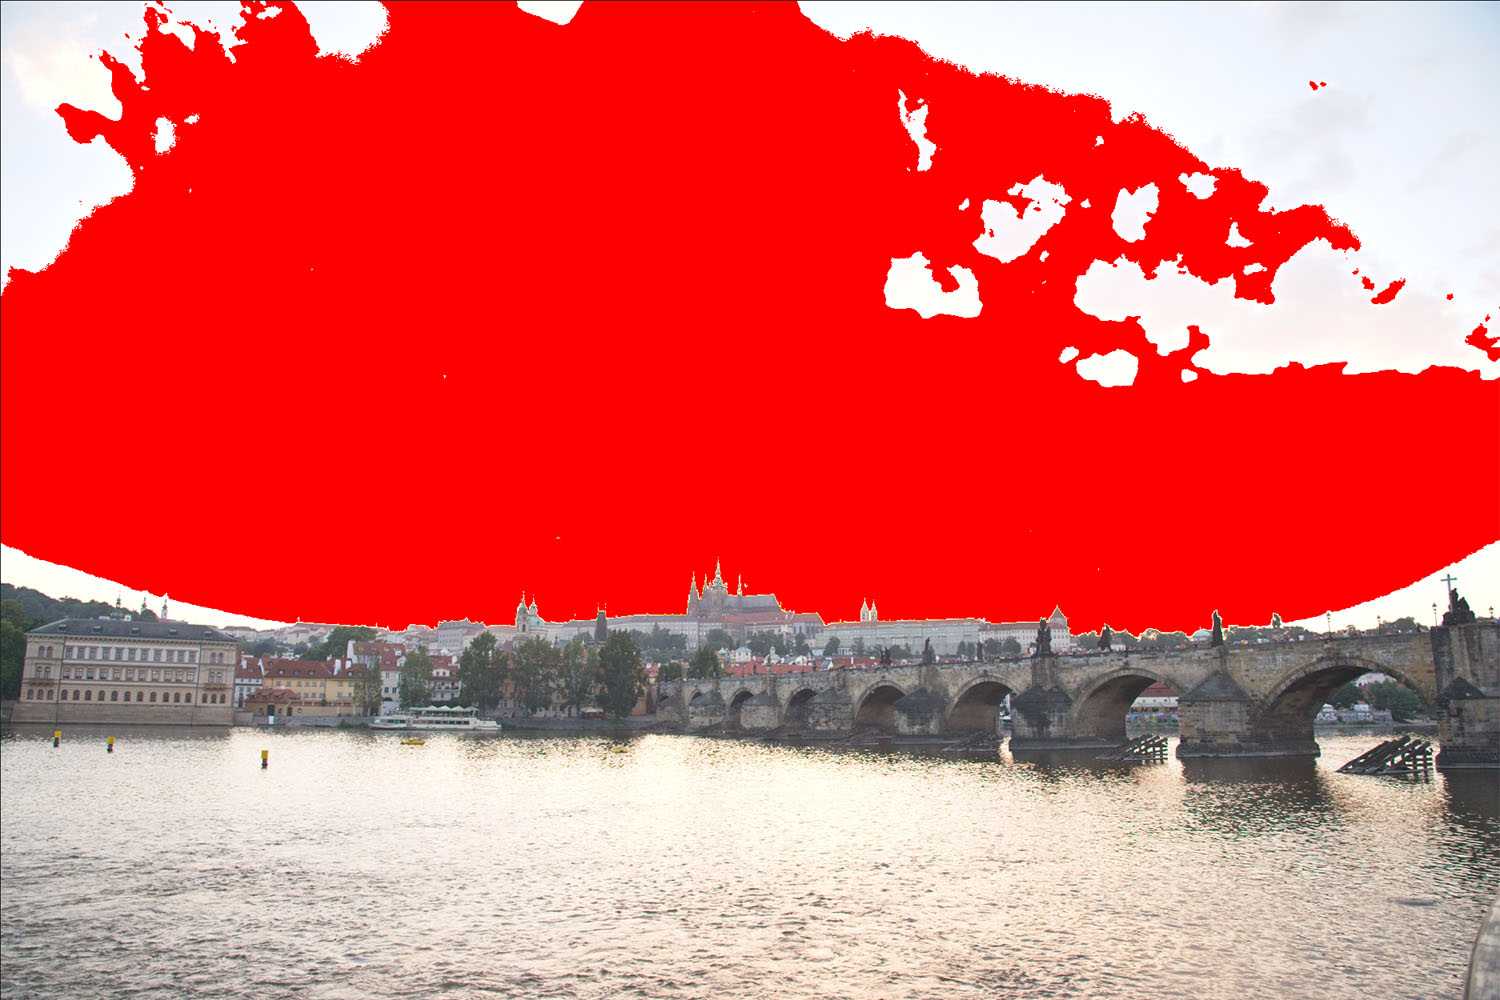
In fact, you have to increase the exposure slider in Lightroom to almost 3EV before you get a similar level of clipping in the sky. There are a couple of reasons this might be the case. Luminar and Photo RAW’s exposure sliders might simply be more sensitive than Lightroom’s, such that a setting of 1.5EV in Luminar or Photo RAW translated to something closer to 3EV in Lightroom. But in comparing luminescence values for the darker portions of the images at similar exposure settings, I don’t think that’s the case. I do think there’s some difference, but it’s relatively small – probably more on the order of 1/3 – 1/2 EV, not 1.5EV. Instead, I think Lightroom’s raw engine is just more sophisticated in how it processes files, and how it saves detail information in the highlights compared to either Luminar or Photo RAW.
In examining the 1:1 crops (screenshots) we can also see that Lightroom gives superior results in shadow detail:
It’s easier still to see this when taking a 3:1 (300%) zoom on the cathedral:
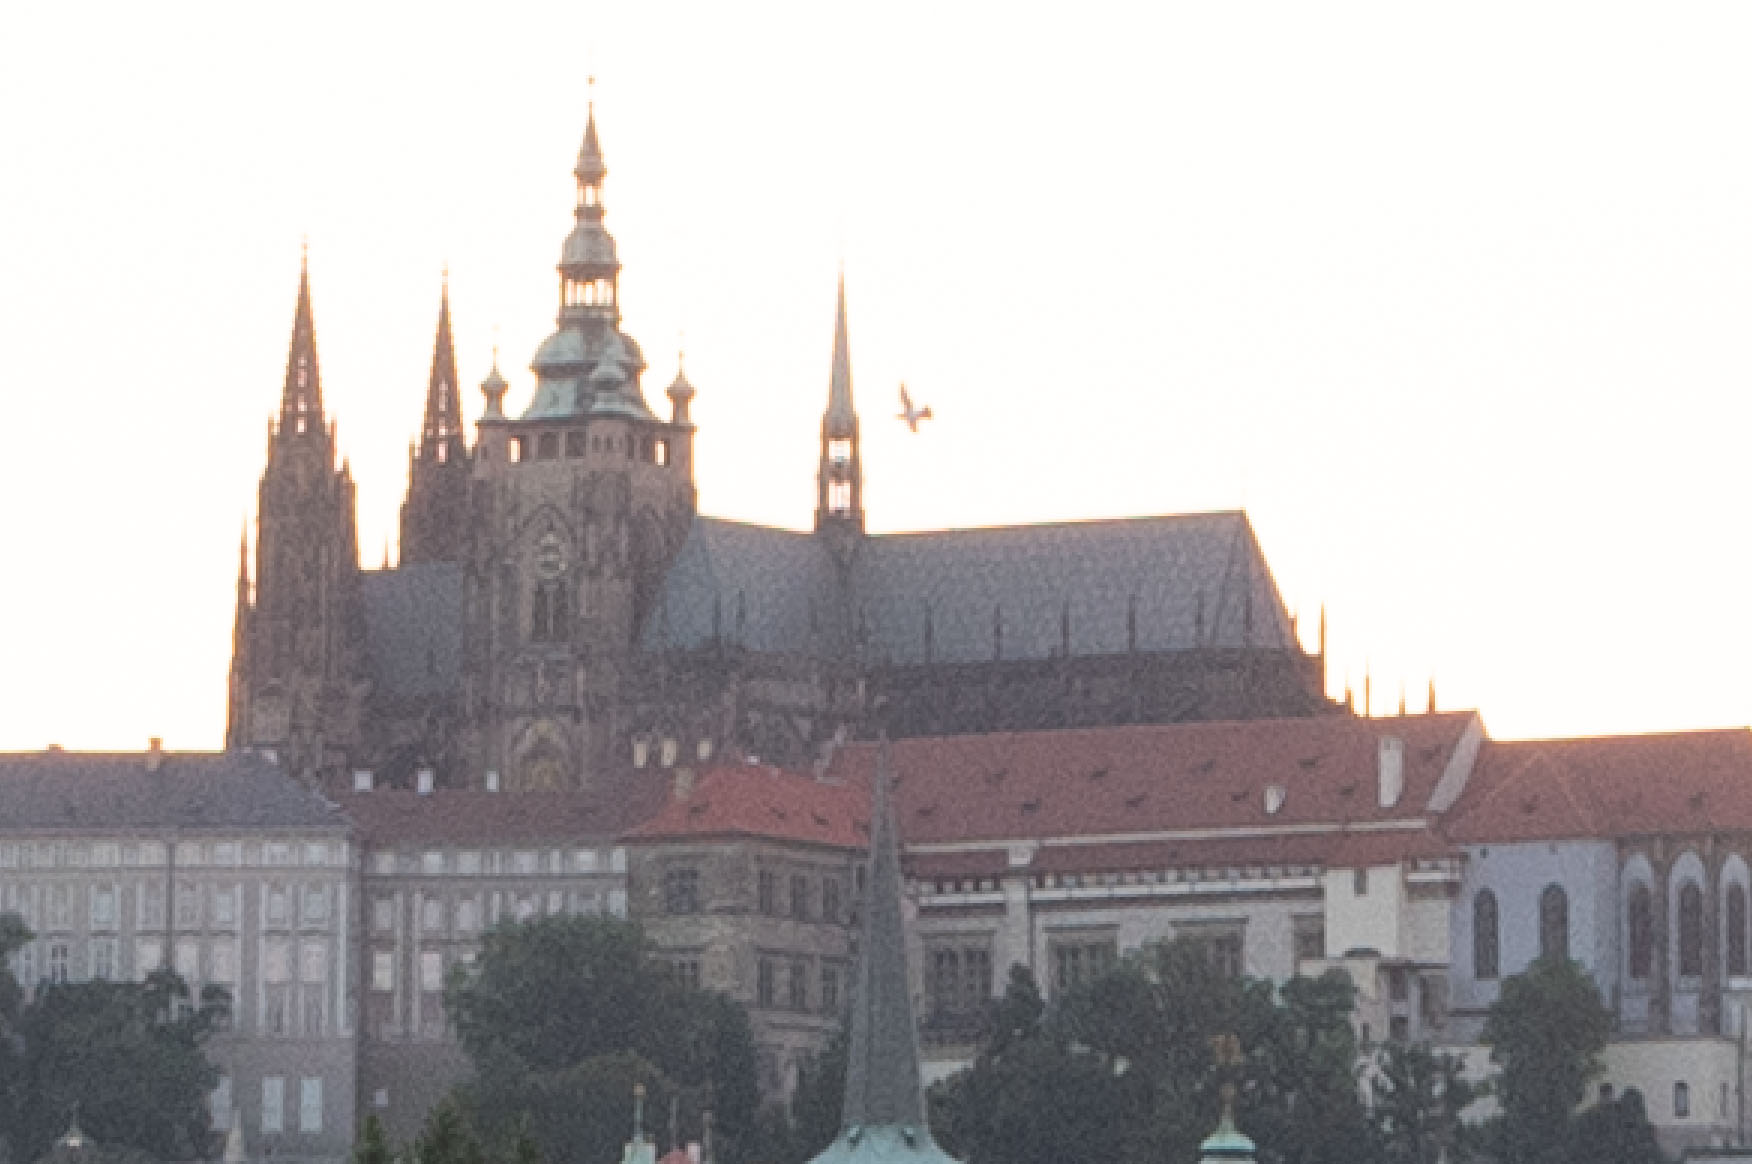
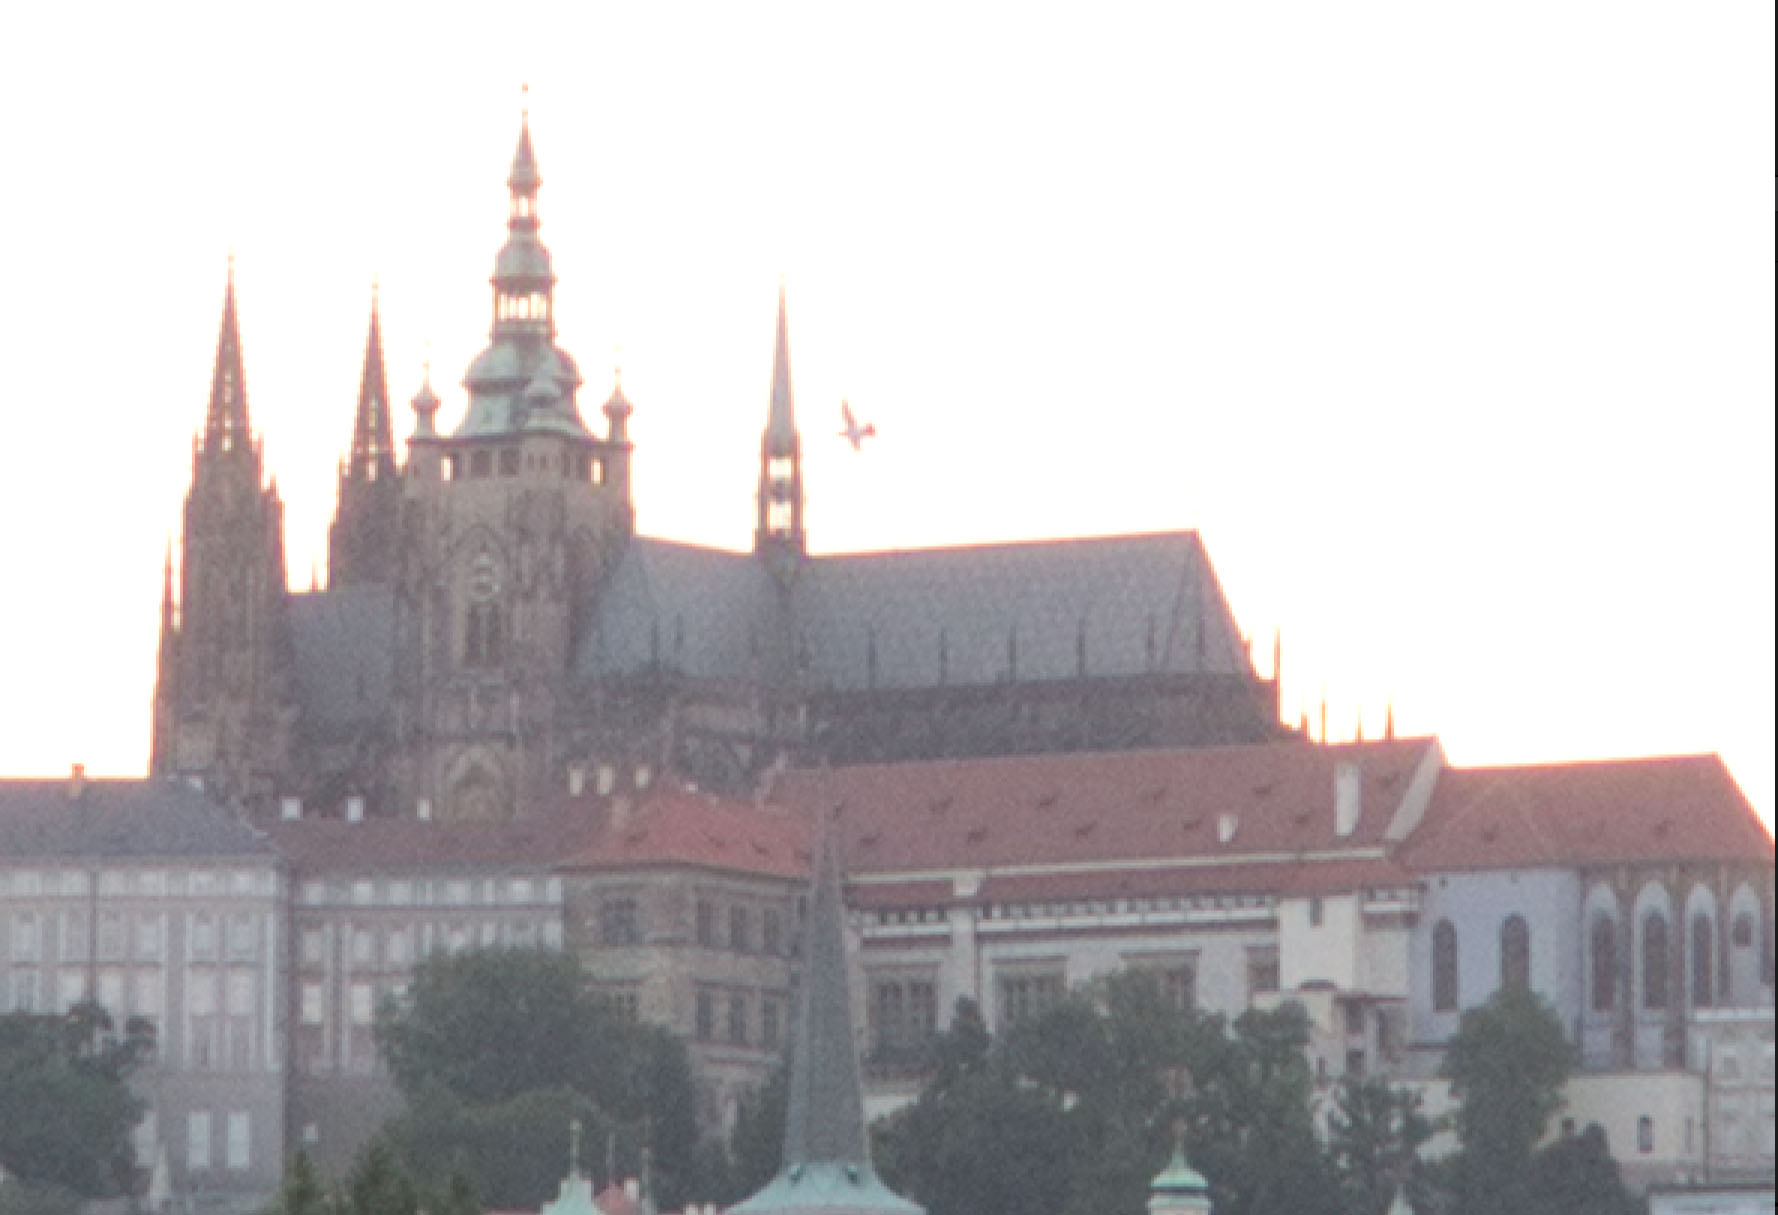
ON1 clearly does the worst here, but it’s also easy to see that Luminar is not as good as Lightroom.
When processing the images with more “advanced” sliders – even something as simple as contrast – getting an apples-to-apples comparison becomes more difficult. Moreover, processing images like this one generally requires lots of local adjustments, and each of these programs has a very different approach and philosophy to these adjustments. Additionally, I simply wasn’t willing to spend the time in any of these packages to get a gallery-level result for the purposes of this post. I did my best to get them somewhat similar, but didn’t obsess over every little detail. So where did I end up? Here’s what I came up with:
All in all, the results aren’t bad for any of the packages, but in my personal opinion Lightroom has by far the easiest workflow for local adjustments, which allowed me to get my LR result in about 2 minutes, while the others took considerably longer. I’m probably least happy with the Photo RAW output, particularly in the clouds, though I suspect with some time I might be able to get a better output.
Looking at each of these files at 1:1, we see a pretty big difference in the color rendering and detail in the shadow sections between Lightroom and the other two. Again, this probably shouldn’t surprise us with what we saw on 1:1 crops above, but the effect seems even more pronounced after local adjustments are applied.
One important note about Photo RAW that I’ll try to research more in the coming weeks: I’ve always had a suspicion that they have random “gates” in their workflow that reduce the image (or parts of the image) to 8-bits, even though Photo RAW claims a 16-bit workflow. Obviously from the images above, there’s plenty of detail in the shadows and the highlights in the file, and when adjusting only the exposure slider, Photo RAW seems to have no problem getting the extremes of both ranges – it’s able to avoid clipping highlights and there’s no problem rendering the shadow detail. But here’s what happens if you reduce the overall exposure in the general settings, then try to bring it up in localized areas using the Local Adjustments tab:
Yikes. That’s ugly. Most of the color and detail in the shadow region is lost. And to be clear, The only difference between this 1:1 section and the one above is that I reduced the overall exposure on the general adjustments, and increased the exposure on the local adjustments. This, again, strongly makes me suspect there’s some 8-bit process in the workflow, probably related to local adjustments or the handoff from global to local. Like I said, I’ll try to see if I can think of ways to poke around on this, but for now I would beware: something looks rotten in the state of Prague.
Everyone has different needs, but when I’m choosing a photo package, my sine qua non is overall image quality. I’m willing to pay more for a program that delivers consistently better results – and in my opinion, Lightroom fits that description at the moment. I have serious, quantifiable concerns with the raw processing pipeline for both Luminar (clipping issues) and Photo RAW (possible 8-bit steps in workflow). I’m sure that Luminar and Photo RAW have some applications where they excel – Photo RAW seems like it’s probably geared toward portrait photographers more than landscape photographers, for example – but as a landscape photography tool, neither of these packages are on par with Lightroom today.