Aerial sunset photography

Chasing sunsets is a hobby of mine, especially in the fall. This year, I brought along my new toy – a DJI Mavic 2 Pro – for the ride as I drove around east Tennessee and western North Carolina in hopes of capturing both fall color and a decent sunset in the same place on the same night. In doing so, I made plenty of mistakes (as usual), and thought I’d summarize some of what I learned and messed up so you hopefully don’t make the same mistakes I did.

  1. Scout, scout, scout. This is always important in terms of landscape photography, but is especially important in terms of drone photography. It’s important to know rules and regs about where you can and can’t fly / launch from, etc., and you’ll want to have a good idea of what you might be able to see from various vantage points. Google Maps (and specifically the 3D terrain feature) is a huge help here. Because you can fly, you don’t have to be as concerned about whether the view from a particular overlook is overgrown with trees such that a photographer with a tripod couldn’t get a decent shot – you just have to fly out 50 meters and you’ve got the perfect shot. The 3D Google Maps view does a great job of letting you see what’s possible.
  2. Check the weather. Nobody wants to drive 2 hours each way only to end up on-site and have the sky be solid overcast. Sometimes you can’t fully predict how the clouds are going to look (especially around here), but weather reports should be able to give you at least some idea. Check them frequently.
  3. Make sure your gear is in order. Multiple times I showed up on site with the phone I normally use for flying completely dead. Another time I ended up with a Mavic battery only charged to 60% because it had been knocked off the charger the night before. These are totally my fault. Don’t do these things. Check and double check to make sure you’ve got everything, and that everything is fully charged.
  4. Show up early. Again, this is important in any kind of landscape photography, but especially so for aerial photography. I try (where possible) to show up 1-1.5 hours before sunset, which gives me plenty of time to adjust to conditions on the fly. 
  5. Take a test flight. No matter how well you’ve done your scouting, there’s a good chance things look different when you get there. I usually burn my first battery flying around the area, testing different compositions, looking for the shot I wanted. While in the air, I also look for different launch spots in the area that might be closer to the my final photo location I choose to minimize launch / recover time (see below).
  6. Have a backup plan. Even if you scouted well, there’s a good chance conditions won’t be perfect when you arrive. Maybe the clouds are further to the east or west than predicted. Before setting out, have some alternate spots you can reach (in time) if it looks like conditions will be better somewhere else (see also: show up early). 
  7. Bring a computer to do some initial processing. This is one I didn’t do this season, but wish I had. If you shoot panoramas a lot (which I do) it can be hard to know how the overall composition is going to turn out by looking at the individual images. Is that road going to be framed where I want it? Should I move the drone a few hundred meters left or right? Would a different altitude help the composition? These are questions that can be hard to answer unless you have access to a computer and some quick photo editing. It’s worth having that ability, even if you don’t use it every time.
  8. Use the map on the controller. Once you’ve found your “final” spot for the night, erase the tracking on your map and note your altitude so you know where to go back to after battery swaps. This way, you can keep a fairly consistent look to your images, even though you’ll have to change batteries at least once.
  9. Minimize launch / recover time. This seems obvious, but is easy to forget in the moment. The more time you spend flying to / from your final photo spot during launch / recover, the less time you’re actually taking pictures. If you can go straight up in the air, or just 25-30m out beyond your launch site, you can spend almost the entire 25 minutes of battery life focused on photography, not on battery management / recovery. Sure, you fan fly half a mile to get to the perfect spot if you need to, but staying as close as possible helps tremendously with battery management (more on which below).
  10. Know your camera. Because the DJI’s sensor isn’t the most amazing in terms of dynamic range, exposing to the right is critical (even if you’re going to use HDR / exposure bracketing). Unfortunately, DJI seems to be quite conservative on their highlight clipping presentation in the app, which means you’re less likely to overexpose a shot, but more likely to underexpose one. This may be related to the 16-bit files the Mavic produces (even though I’m fairly sure it has only a 12-bit signal path), but highlight recovery is surprisingly good – good enough that I’m starting to push the exposures 0.7-1.3 EV over what I normally would, both for the center point of an AEB, or a single automatic panorama. The histogram (instead of the zebras) can be helpful here, though not definitive. More research needed :).
  11. Plan your battery swaps ahead of time, and keep a close eye on the clock. The worst thing you can do is be on the ground when the clouds light up overhead. Actually, worse than that would be to run out of battery and start recovery on battery 2 just as the clouds light up overhead. Don’t do that. Most of the action is going to be concentrated in the 10 minutes either side of the published sunset time. Therefore knowing what time the sun sets is crucial. From there, you can back out when you want to launch and recover. If, for example, sunset is at 1850, I would plan to launch my first flight sometime in the 1730-1745 range to fly the area and find my final photography spot for the evening. This would give me plenty of time to fly, shoot some test images, recover, analyze, and drive to another location if necessary. I don’t feel the need to use up my entire battery on this flight – in fact, if I don’t have to, I’d prefer to save it, just in case. But taking the test flight is usually a good idea. My second flight would probably launch at around 1815-1820. My goal in this flight would be to get on station, make any final adjustments, and get some initial shots of the sunset. This would depend somewhat on how the clouds are laid out – if it looked like a sunset that would have more action after the sun goes down, and if I knew my launch / recover time was very short (e.g. 1 minute) I might delay a bit and plan on a quick battery swap near sunset to give me more time between sunset and dusk. Usually, though, I’m timing this flight to be done at about 10 minutes before sunset. I try to time my final flight of the evening to launch about 7-10 minutes before published sunset. This gives me a good 10-15 minutes after sunset in case the clouds light up, and leaves me landing basically in the dark.
  12. Don’t leave too early. The real show often starts after the sun goes down. In a lot of cases, sunsets get worse before they get better. Sometimes they don’t get better, but in many cases the most rich and vibrant colors happen after the sun goes down (and after the color has diminished somewhat), not before. With a little experience you’ll learn when this is likely to be the case, but always stay on station several minutes after the sun “officially” goes down – you’re likely to be rewarded.
  13. Shooting panoramas: I typically tried to hedge my bets by using a couple of forms of shooting in camera. It turns out you can get some pretty good results with a single-layer, properly exposed panorama on the Mavic 2 Pro. The key there is “properly exposed” – and by properly exposed, I mean exposed as far to the right as you can get it without blowing out the highlights. The easiest way to get a decently exposed shot is to use AEB with a slightly over-exposed bias, as I mentioned above. My typical procedure is to take several AEB shots, interspersed with some shots taken using DJI’s automatic panorama mode (both horizontal and, more frequently, the 180-degree mode). For my own shots, I would typically use gimbal angles of +17 and -15, starting with the upper left shot, then zig-zagging across the frame (upper left, lower left, lower center, upper center, upper right, lower right), resulting in 2 rows, 3 columns of images. Using a 5 bracket AEB, this gives you 30 images in total. DJI’s auto panorama function can be used to shoot either a 9-image bracket (3×3) or a 21-image bracket (3×7) 180-degree panorama. DJI uses +18, -2, and -22 for its gimbal angles, so you can get approximately the same coverage with two rows (there are advantages and disadvantages to doing this). In the end, there’s no “right” way here – both work, and both have different strengths and weaknesses when it comes to processing.
Dynamic range and bits of resolution: these are not the same thing

There’s a lot of information online talking about 12-bit files, 14-bit files, and how one is or isn’t better than the other. Most of these posts feature some sort of subjective discussion showing that under specific test conditions they created, 14-bit files either do or don’t offer some advantage, which not surprisingly often seems to confirm whatever position the author had before they conducted their experiment. People start using terms like “smooth gradients” or “dynamic range” seemingly without understanding how all of these factors (sensor, exposure, bit-depth) are all related to each other.

Here’s the thing: bit-depth *does* matter, but it doesn’t always matter in the way people think it does. And it doesn’t always matter in the same way. Sometimes you need those bits. Other times they’re just storing noise. Sometimes they’re not storing anything at all. Anybody telling you that you should definitely, absolutely shoot in 14-bits, or alternatively that shooting in 14-bits gives you no real advantage probably don’t understand the full picture. Let’s cook up a quick experiment to illustrate.

First, a refresher: extra bits help us store information. Most people are probably aware that digital images are, at their core, numbers. Vastly oversimplified, image sensors count the number of photons (packets of light) that arrive at each pixel. If no photons arrive, and the pixel is black. If a lot of photons arrive, and that pixel gets brighter and brighter. If photons keep arriving after the pixel is already fully “white,” those additional photons won’t be counted – the pixel will “clip,” and we’ll lose information in that portion of the image. 

When we talk about the number of bits in a raw file, what we’re really talking about is the precision we have between those darkest black values and white values. If we had a 1-bit sensor, we’d have only two options: black and white. If we have a 12-bit sensor, we have 4,096 possible values for each individual pixel. 14-bit sensors have 16,384, and 16-bit sensors 65,536. Each bit you add doubles the amount of precision you have, or the amount of information you can store. But it’s critical to remember here that the way we store information is decoupled from what the sensor can actually detect. The deepest black and the brightest white the sensor can detect are whatever they happen to be. The bit-depth is how many finite steps we’re able to chop that into.

So here’s the setup: a couple of days ago I got my a new toy – a DJI Mavic 2 Pro with a Hasselblad-branded (probably Sony-produced) 1″ sensor. There’s not a lot of information about this sensor online, and various people have been asking about what bit-depth the RAW files are out of the camera. Fortunately, this is easy enough to figure out. Let’s just download Rawshack – our trusty (free) raw analysis tool – and run a file through it:

               File: d:\phototemp\MavicTest\2018\2018-09-20\DJI_0167.DNG
             Camera: Hasselblad L1D-20c
    Exposure/Params: ISO 100 f/8 1/800s 10mm
   Image dimensions: 5472x3648 (pixel count = 19,961,856)
Analyzed image rect: 0000x0000 to 5472x3648 (pixel count = 19,961,856)
Clipping levels src: Channel Maximums
    Clipping levels: Red=61,440; Green=61,440; Blue=61,440; Green_2=61,440
        Black point: 0

Interesting. The DJI is giving us 16-bit raw files. That’s two whole bits more than my D850 or A7Rmk2! Four times the information and WAY MORE DYNAMIC RANGE! SCORE!

Not so fast. 

Just because our data is stored in a 16-bit-per-pixel file doesn’t mean we’ve actually got 16-bits of information. Data and information are different things after all. So let’s dig in a little more deeply. Let’s take three different cameras with three different sensor sizes that produce raw files with three different bit depths and compare their outputs on a common scene:

  • The DJI Mavic 2 Pro – a 1″ (13.2×8.8mm) sensor producing 16-bit raw files
  • The Panasonic GH4 – a Micro Four-Thirds (18×13.5mm) sensor producing 12-bit raw files
  • The Nikon D850 – a full frame (36x24mm) sensor producing 14-bit raw files.

We don’t really have to run this test to know which one is going to win: it’s going to be the D850, and my guess is that it’s not even going to be close. For the other two, though, it’s harder to know which will perform better. The Panasonic has a larger sensor and a lower pixel count, which should give it some advantage. But it’s also a 5-year old design, and we know it’s a 12-bit sensor. A decent 12-bit sensor, it must be said, but we’re not expecting D850 or Sony A7Rmk3 levels of performance. The DJI may have a smaller sensor, but it’s likely to be a more modern design, and we’re at least getting 16-bit values from the camera, even if the underlying information may be something less than that. Let’s dive deeper.

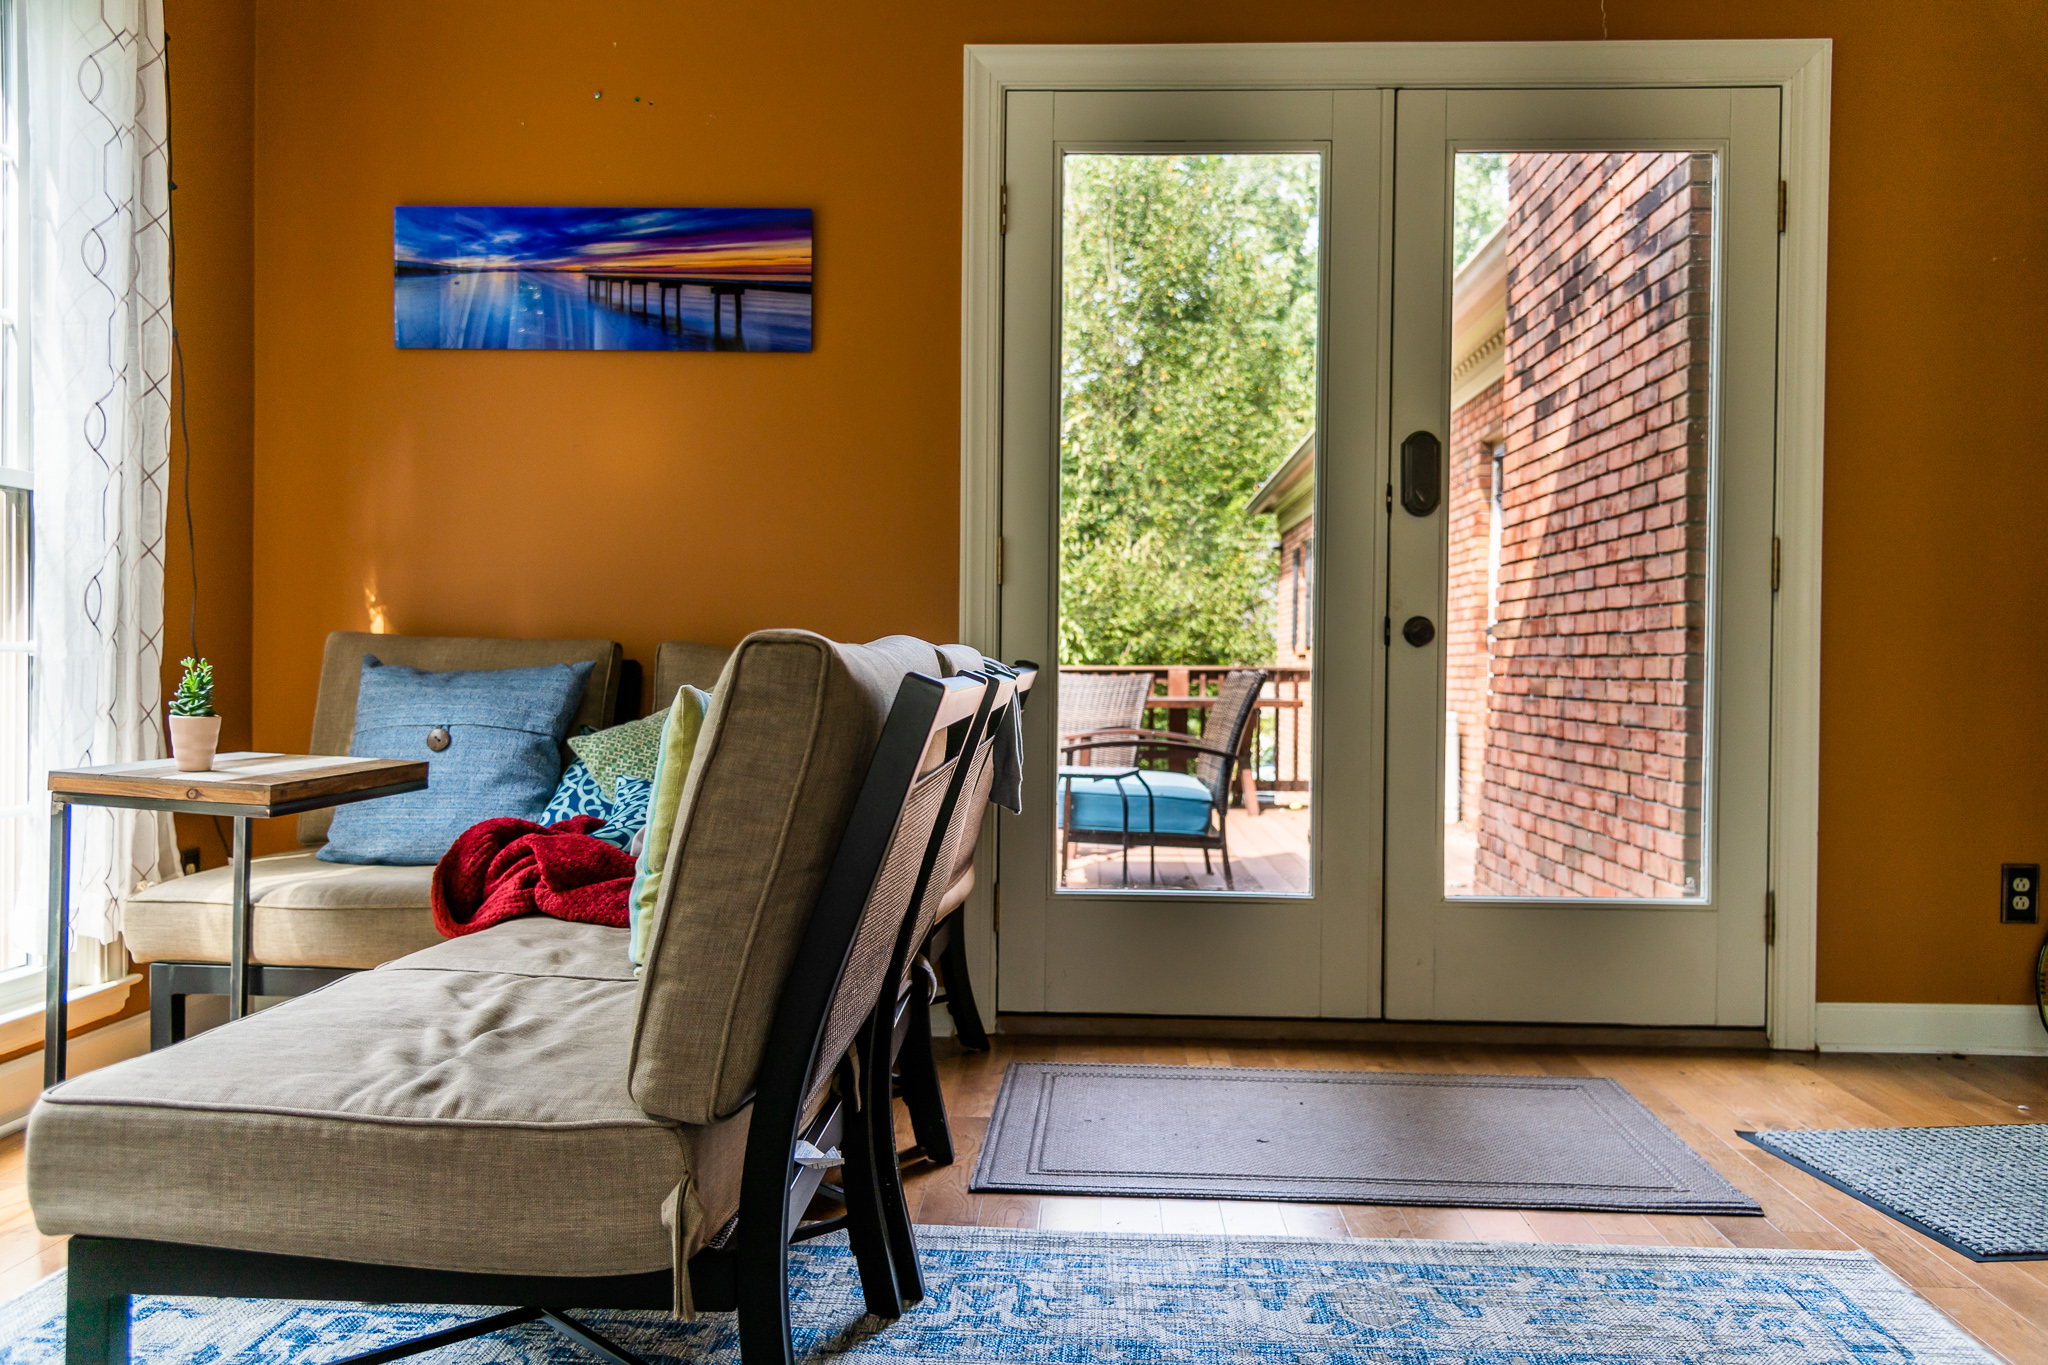
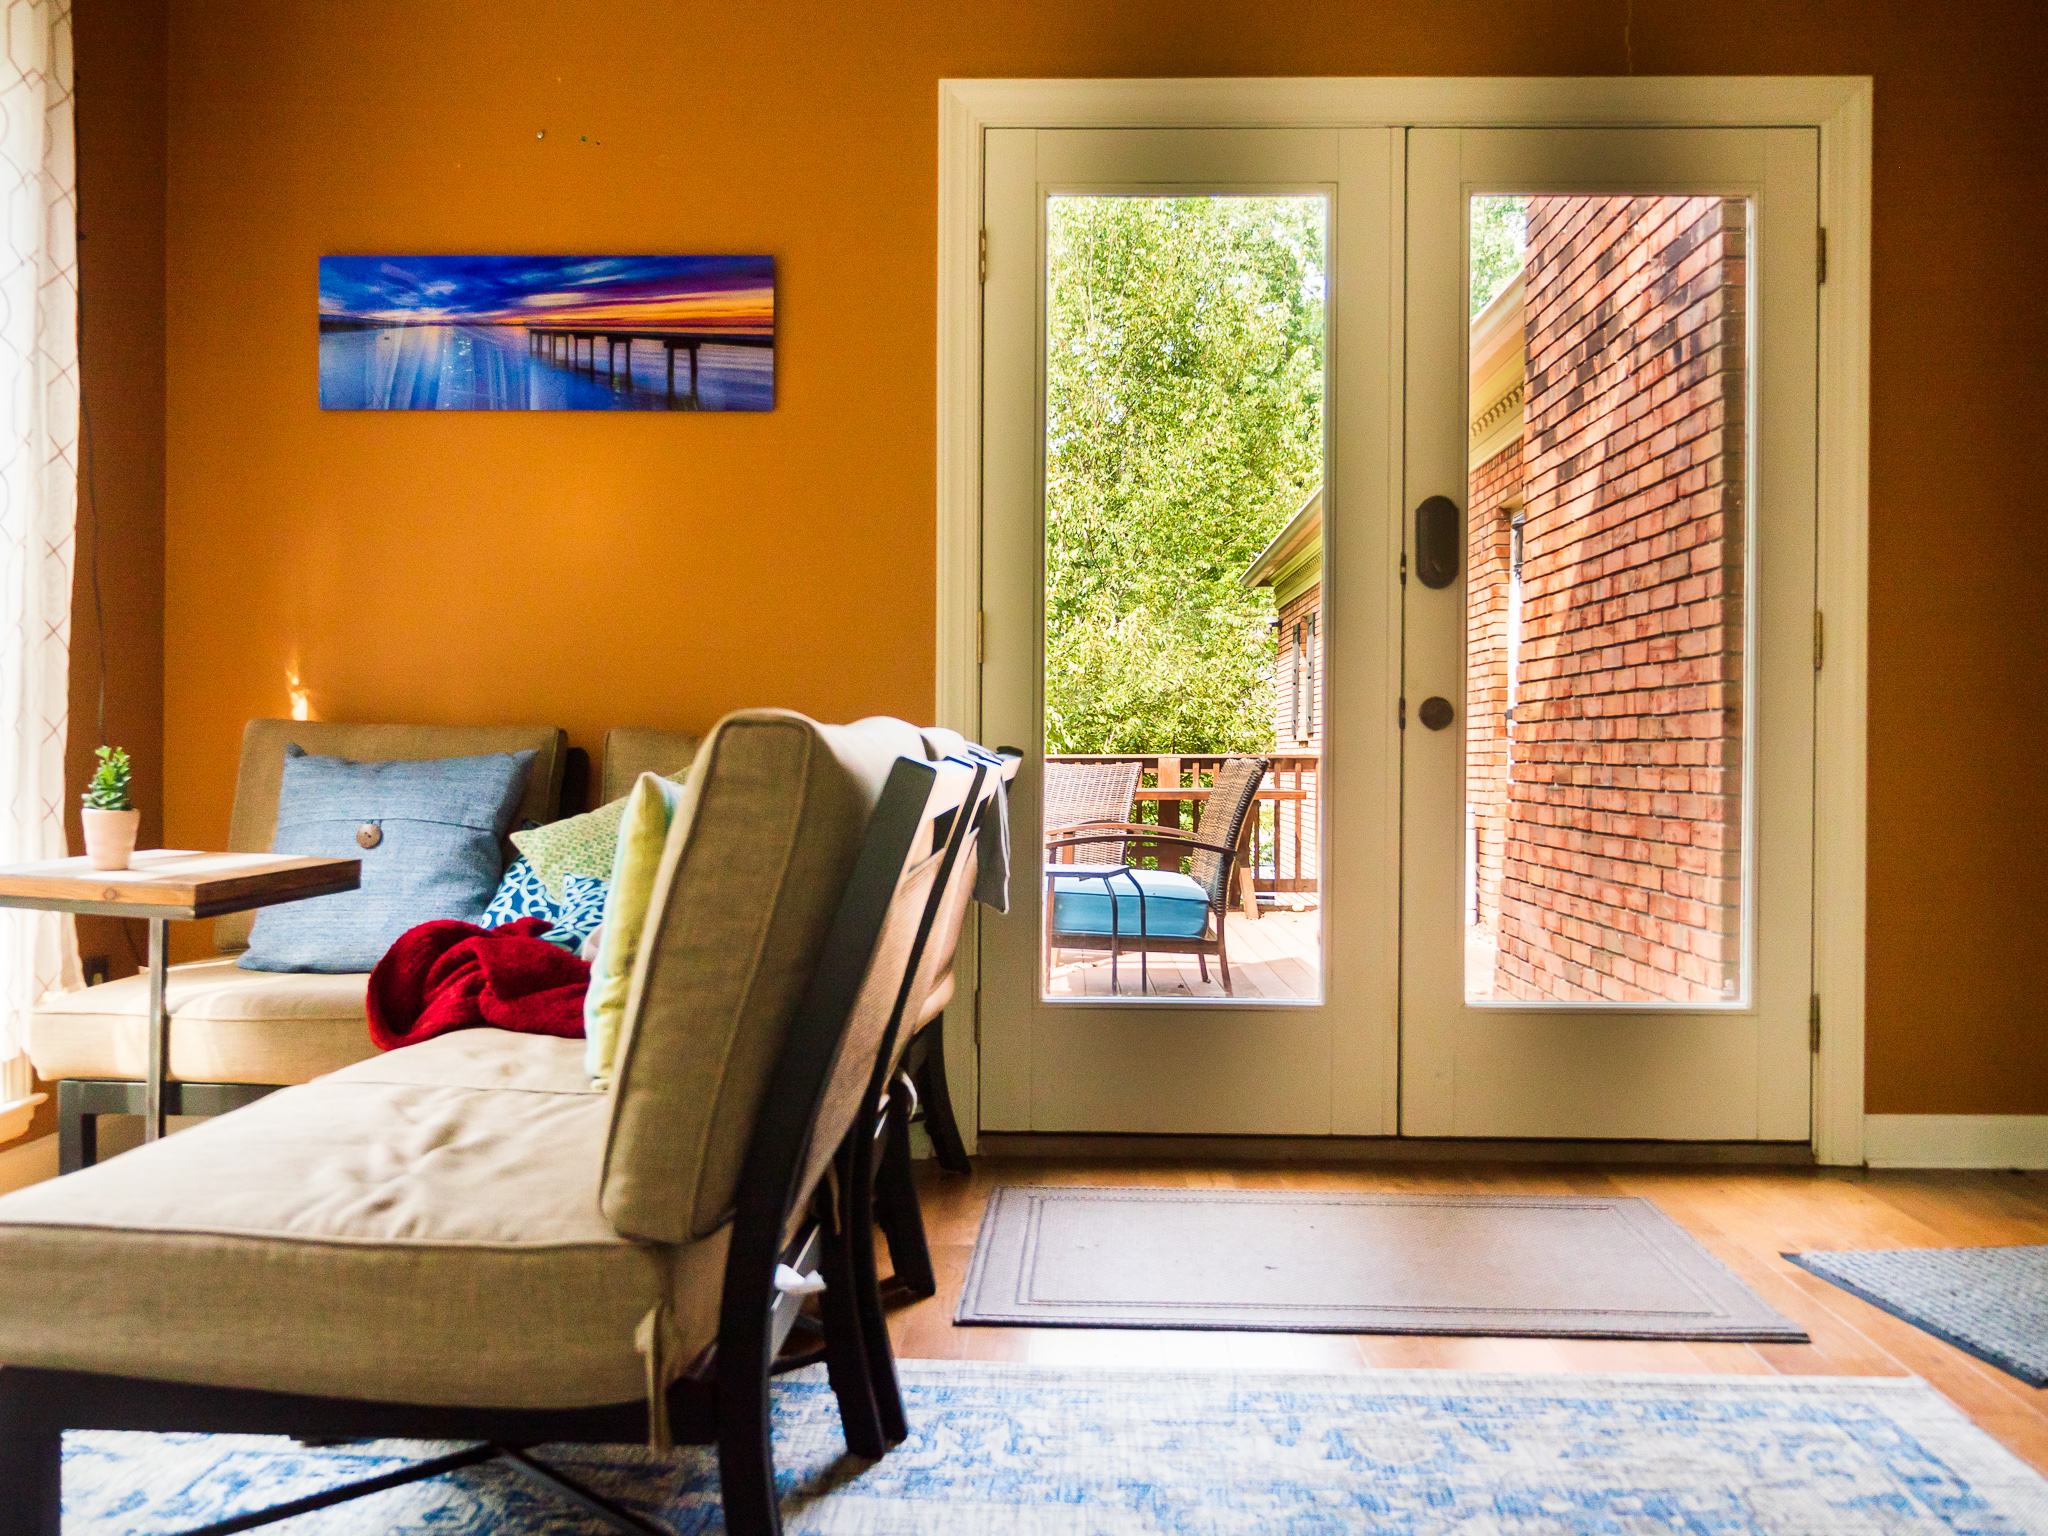
To do this analysis in full would require a little more time than I have on my hands, so I’m going to do it quickly, then followup later if necessary. I took all three of these cameras to the sunroom in my house and shot a few quick images. I used the base-ISO for each camera (100 for the DJI, 200 for the Panasonic, and 64 for the D850) of approximately the same scene. It turns out that it’s hard to precisely position the Mavic exactly where I wanted it to be indoors, so the composition is a bit off. But it should be close enough. I bracketed shots on all cameras and tried to pick the ones that had the most similar exposure. I then selected the shot for each camera where I’ve got the brightest exposure without really clipping the highlights (though the Mavic did have slightly clipped highlights – more on which below).

From there, I’m running all the files through Rawshack with the –blacksubtraction option. What that does is basically take the lowest value for each channel and set that to zero, then reference the other values to that. You want to do that because there’s always going to be a little bit of bias in the sensor (it will never truly output zero), and this helps you see the “true” distribution of values.

Here’s what we get for each camera:

Nikon D850:

Pixel counts for each raw stop:
    Stop #/Range         Red        Green         Blue      Green_2
 ---------------  ----------   ----------   ----------   ----------
 0 [00000-00001]     140,756       13,885      138,964       13,810
 1 [00002-00003]     126,935       73,206      558,197       73,104
 2 [00004-00007]     544,177      353,258    1,240,469      352,003
 3 [00008-00015]   1,741,924    1,274,645    1,967,536    1,266,982
 4 [00016-00031]   2,752,687    2,104,326    1,793,851    2,102,555
 5 [00032-00063]   3,071,078    2,407,673    2,117,626    2,412,529
 6 [00064-00127]   1,014,943    2,224,467    1,270,294    2,227,906
 7 [00128-00255]     481,901    1,021,033      785,625    1,021,787
 8 [00256-00511]     607,242      560,244      580,620      560,625
 9 [00512-01023]     632,401      536,646      699,715      536,833
10 [01024-02047]     272,303      613,343      251,394      613,667
11 [02048-04095]      49,551      236,836       30,016      237,642
12 [04096-08191]       1,520       16,755        2,960       16,902
13 [08192-16383]          22        1,123          173        1,095
14 [16384-32767]           0            0            0            0
15 [32768-65535]           0            0            0            0

Panasonic GH4:

Pixel counts for each raw stop:
    Stop #/Range         Red        Green         Blue      Green_2
 ---------------  ----------   ----------   ----------   ----------
 0 [00000-00001]     287,124       59,435      664,336       61,725
 1 [00002-00003]     381,373      139,899      560,799      143,261
 2 [00004-00007]     747,955      451,142      565,381      452,576
 3 [00008-00015]   1,111,057      821,821      645,533      820,871
 4 [00016-00031]     721,705      812,997      606,981      809,753
 5 [00032-00063]     214,788      823,544      406,585      821,248
 6 [00064-00127]     160,735      333,134      189,947      332,785
 7 [00128-00255]     206,345      169,835      207,674      170,031
 8 [00256-00511]     131,895      181,100      128,517      181,018
 9 [00512-01023]      42,474      154,883       33,249      154,631
10 [01024-02047]       7,845       57,408        3,857       57,236
11 [02048-04095]         336        8,434          773        8,497
12 [04096-08191]           0            0            0            0
13 [08192-16383]           0            0            0            0
14 [16384-32767]           0            0            0            0
15 [32768-65535]           0            0            0            0

So the first two cameras are basically what we would expect, though it is impressive to see how much more detail the Nikon captures in the mid tones. But the Mavic gives us a bit of a different picture:

DJI Mavic Pro 2:

    Stop #/Range         Red        Green         Blue      Green_2
 ---------------  ----------   ----------   ----------   ----------
 0 [00000-00001]      90,499       13,282       20,690       13,193
 1 [00002-00003]         206           60       95,658           59
 2 [00004-00007]           0            0            0            0
 3 [00008-00015]           0            0            0            0
 4 [00016-00031]     148,885       36,053      226,561       35,664
 5 [00032-00063]     480,523      161,326      661,729      159,561
 6 [00064-00127]   1,015,016      519,604    1,012,456      518,136
 7 [00128-00255]   1,367,088      973,210      716,503      964,446
 8 [00256-00511]     940,418    1,097,044      881,097    1,105,995
 9 [00512-01023]     243,864      874,212      521,857      872,455
10 [01024-02047]     202,575      518,261      205,307      522,762
11 [02048-04095]     166,856      187,300      253,954      187,689
12 [04096-08191]     145,652      216,935      186,091      216,392
13 [08192-16383]     105,548      138,800      119,127      139,628
14 [16384-32767]      60,372      136,129       65,635      135,767
15 [32768-65535]      22,962      118,248       23,799      118,717

Ok, so what’s happening here?

The first thing to notice is that on the DJI, the black level isn’t *really* the black level. In other words, the smallest pixel values in the file are between 4 and 5 bits below where the “real” black point is. To be clear, I’ve looked at several DJI raw files now with a high dynamic range scene and this pattern holds true. In all cases, there are some pixels at range 0 and 1, none at 2 and 3, and then the rest of the file resumes at “bits” 4-15. This suggests that even though we may have a 16-bit file (that has real, 16-bit values), we don’t have a 16-bit signal path. In particular, “bits” 2 and 3 are telling here: we could remove them entirely and have zero loss of information.

So how does this translate into actual images? Again, keeping in mind that these are shots that were taken quickly, not synced up in either exposure or exact positioning, and were all processed quickly:

D850 (ISO 64, f4, 1/125 – pushed +3.3EV in post):

Panasonic GH4 (ISO 200, f2.8, 1/400, pushed +4.2EV in post):

DJI Mavic 2 (ISO 100, f2.8, 1/120, pushed +2.4EV in post):

We can see a couple of things here. First, there’s really no comparison in terms of shadow detail – the D850 absolutely cleans up. Sure, it’s a bit OOF, but when you start looking at the gradients on the wall on either side of the frame, there’s really no comparison – especially at 1:1. Part of this comes down to better DR, and part of it comes down to a 45MP sensor, but the result is what’s important – as we expected, the D850 wins and it’s not close.

A little more surprising to me is the fact that the Panasonic is pretty clearly better than the DJI, in spite of being a much older design. I’m not sure this will be universally true, and I’ll have to do some more experimentation over the coming weeks, but the DJI definitely has significantly more noise in the shadows, even though it’s been pushed significantly less (1.5 stops) in post, *and* it has a base ISO that’s a stop better. In other words, the deck is actually stacked against the Panasonic here – the original DJI exposure was 1EV greater than the Panasonic, and yet its performance in the shadows is visually worse. The GH4 doesn’t fly (unless it’s mounted on a *much* more expensive drone), but it does appear to have the better sensor, at least in my initial tests.

So what have we learned? 

For starters, just because you’ve got a 16-bit raw file doesn’t mean you’ve got 16 bits of information. The DJI absolutely has an “advantage” if you’re just looking at the bit-depth of the raw file, but that doesn’t mean the underlying hardware or signal path is actually giving you 16 bits. DJI does have more precision, but it’s precision isn’t really being used. That becomes obvious when we subtract out the black level and see that the bottom four bits are essentially being thrown away. We’re storing 16-bits, but only 12 of them are being used in a meaningful way. 

We can also see that sensor size has a pretty major impact on dynamic range and shadow detail – the GH4 with its 6 year old sensor is able to beat the DJI pretty easily. The D850, with its modern, full frame, BSI sensor, gives an even more impressive performance.

The bottom line is this: the number of bits you’re getting out of the camera doesn’t necessarily tell you anything about how well it’s going to perform in difficult lighting tasks. Having more bits means you can theoretically store additional information, but obviously that’s only possible if the additional information is there to store. Whether there’s actually additional information is something a lot more complicated than you’re going to get from just looking at a spec-sheet.